I used to never eat salad.Probably because I didn’t like vegetables.But over the last few years I’ve come to love vegetables and at times even crave them.It’s funny how tastes change.When I began eating salad, I slowly eased my way in by selecting only those that were made of iceberg lettuce.Now I’m a little bit of a salad snob and prefer those that have dark, luscious greens like romaine or spinach.Not only do they taste good, but they’re more nutritious for you as well.
And toppings?!Oh how I love salads with unique toppings.One of my favorite salads that we eat regularly throughout the week is Spinach Salad with Salmon & Dried Cherries.Besides dried cherries some of my favorite toppings are avocadoes, roasted sweet potatoes, toasted pine nuts, and the list goes on.Hence the recipe for this unique dish!
It all began at work when my manager offered my co-workers and I some of her salad.It looked very intriguing with nectarines scattered on top, whole walnut pieces, and goat cheese (chevre). When I took my first bite, WOW, what a combination!The sweetness of the nectarines, followed by the crunch of the walnuts, and creamy goat cheese was out of this world.I was hooked and knew I had to re-create this at home.I hope you enjoy it as much as I do.
Nectarine & Goat Cheese Salad
Original recipe by Alissa Hebert
Serves: 2
Prep Time:10 mins.
Total Time:20 mins.
Ingredients:
Salad
4 cups spring mix or your favorite greens such as arugula, spinach, etc.
1 nectarine (or peach if preferred)
2 oz. chevre (goat cheese)
1/2 cup walnuts
Dressing
1 tablespoon white wine vinegar
2 teaspoons honey
1 teaspoon Dijon mustard
1/4 teaspoon sea salt
1/4 teaspoon pepper
2 tablespoons olive oil
Directions:
Preheat oven to 350˚F.
Assemble dressing in a small bowl by combining: vinegar, honey, mustard, salt and pepper.While whisking, slowly add in the olive oil.Cover and refrigerate.
Toast walnuts by placing on a baking sheet and bake for 8-10 minutes.Remove when walnuts have a hint of brown and become fragrant.
Place spring mix in a large bowl or on a large plate.
Cut the nectarine into 6 to 8 slices.Place on top of the spring mix.
Evenly distribute the toasted walnuts over the salad.
Break apart the goat cheese into mini bite size pieces.This can be done by using a spoon to scoop small dollops, or use a knife to cut mini pieces.Distribute evenly on top of the salad.
Drizzle with desired amount of dressing and serve.
In
the summer there always seems to be an abundance of tomatoes at our house.We have a small garden with a few kinds, but
we also try different varieties from our farmers market.I love having fresh tomatoes readily on hand to
garnish sandwiches and burgers or to simply eat cherry tomatoes as a quick
snack.
Since
we have a stock supply of tomatoes, I have a basil plant that I keep on my back
porch for easy picking.Fresh basil has
a wonderful flavor and pairs extremely well with tomatoes.Taking all this into account, you can say I’ve
gotten pretty creative with tomato recipes.My favorite snack or appetizer has to be Tomato, Basil & MozzarellaPoppers.But this week I discovered a
new dish from a recipe I found on Pinterest.This is a cold, refreshing side dish that you can serve with just about
any meal.And the best part is it’s
extremely easy to put together.
Garbanzo Beans/Chickpeas
The
key ingredients are grape tomatoes, garbanzo beans (chickpeas), and basil.Keep in mind that you can always cut whole
tomatoes into bite size pieces if you don’t have grape tomatoes accessible.If you’re not familiar with chickpeas, they
have a mild nutty flavor and are rich in minerals.They’re quite popular in vegetarian dishes as
they’re an excellent source of protein.Just
one cup of chickpeas contains 29% of your recommended protein intake.If that doesn’t entice you, just know that
this salad is healthy and will leave you feeling invigorated.Give it a try during these hot summer months.After all, it’ll only take you 10 minutes to
assemble.
Tomato
Chickpea Salad
Adapted from Green Lite Bites blog
Serves: 4 to 5 people
Prep Time: 5 minutes
Total Time:10 minutes
Ingredients:
1 (15.5
oz.) can garbanzo beans (chickpeas)
1
pint grape tomatoes
25
large basil leaves
1 ½ teaspoons
garlic, minced
1
tablespoon red wine vinegar
1 tablespoon
apple cider vinegar
2
teaspoons olive oil
1/2
tablespoon honey
pinch
of salt
Directions:
Drain chickpeas and rinse in a strainer to
remove the starch.Place in a large
bowl.
Chop the basil and cut the tomatoes in half.Add to the bowl and combine with the chickpeas.
Add remaining ingredients to the bowl.Stir to combine well.
Refrigerate for 30 minutes before serving.Serve cold.
Many times I find myself deciding what type of side dish to make
with dinner. With summer quickly
approaching, as well as my birthday (the big THREE O), my husband and I have
vowed to eat healthier and exercise more.
This helps narrow our selection. Or
maybe ‘narrow’ isn’t the right word. I’ve
found that you can eat a lot of vegetables for not very many calories at
all. I guess you could say this is a learning
experience and has opened new doors for me.
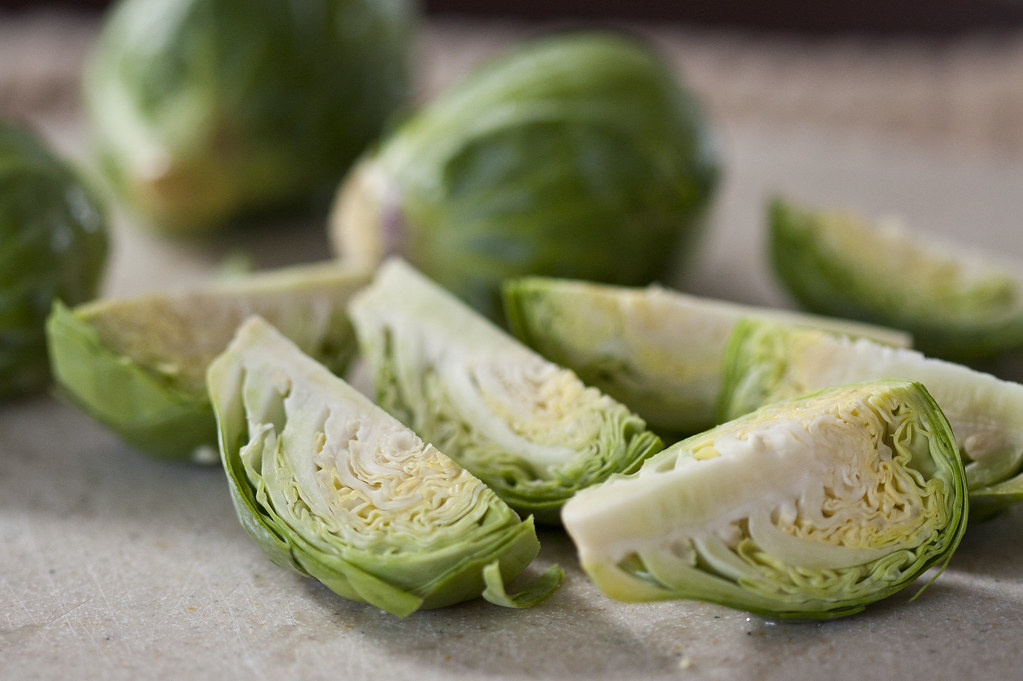
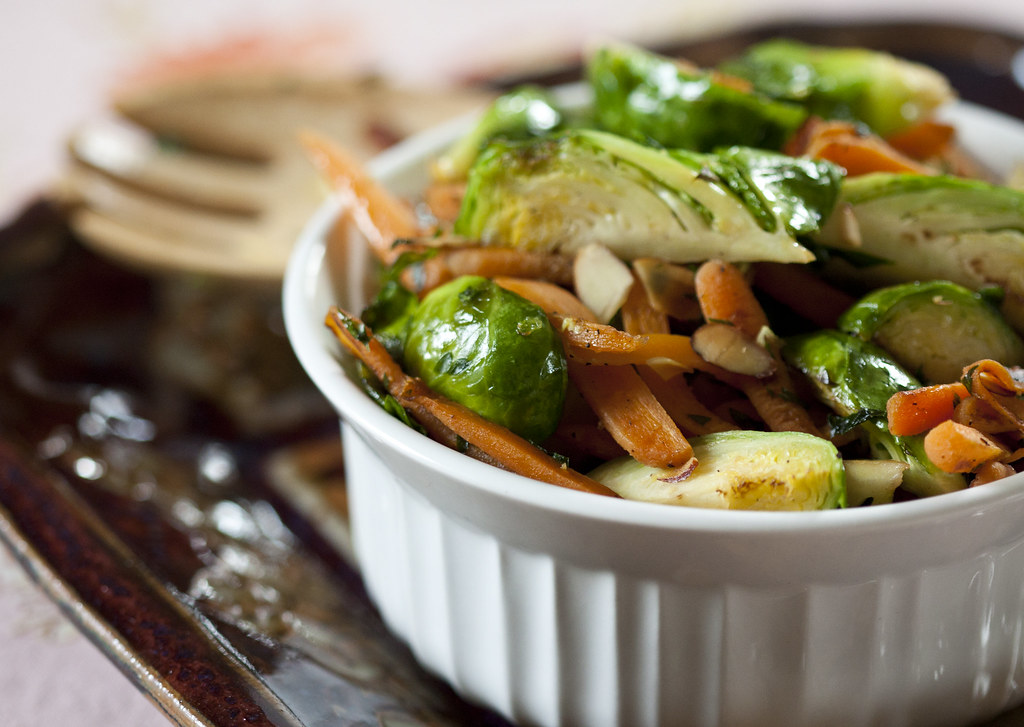
There are so many vegetables we’ve never tried. For instance Brussels sprouts.
I know what you’re thinking….yuck! Isn’t that the vegetable that everyone
despises? The one that causes kids to turn
their noses up in disgust? Yes, that’s
the one I’m talking about. I thought
those same exact things myself. Actually,
I’m not quite sure why I didn’t move onto the next recipe when I stumbled
across this one. Ohhh I remember what
caught my attention. One serving size of this dish is
only 84 calories.
I decided to give Brussels sprouts a try. Okay, I admit I wasn’t brave enough to eat
them alone. I enjoy carrots and almonds which is why I thought this recipe
would be perfect for easing me into Brussels sprouts. Plus, as I searched online, I learned that
Brussels sprouts offer some great health benefits. Not only do Brussels sprouts help lower
cholesterol, but they also help fight against cancer and even prevent some
forms of cancer. What else? They are extremely high in Vitamin K (one cup
contains 273.5% of the recommended dietary allowance). They’re also a great source of Vitamin C (one
cup contains over 161% of the recommended dietary allowance).
With all of the above health benefits, how could we go wrong
with this dish? I made it to go along with
one of our favorite salmon dinners (Honey Mustard Glazed Salmon) and we were
quite surprised. Never having experienced
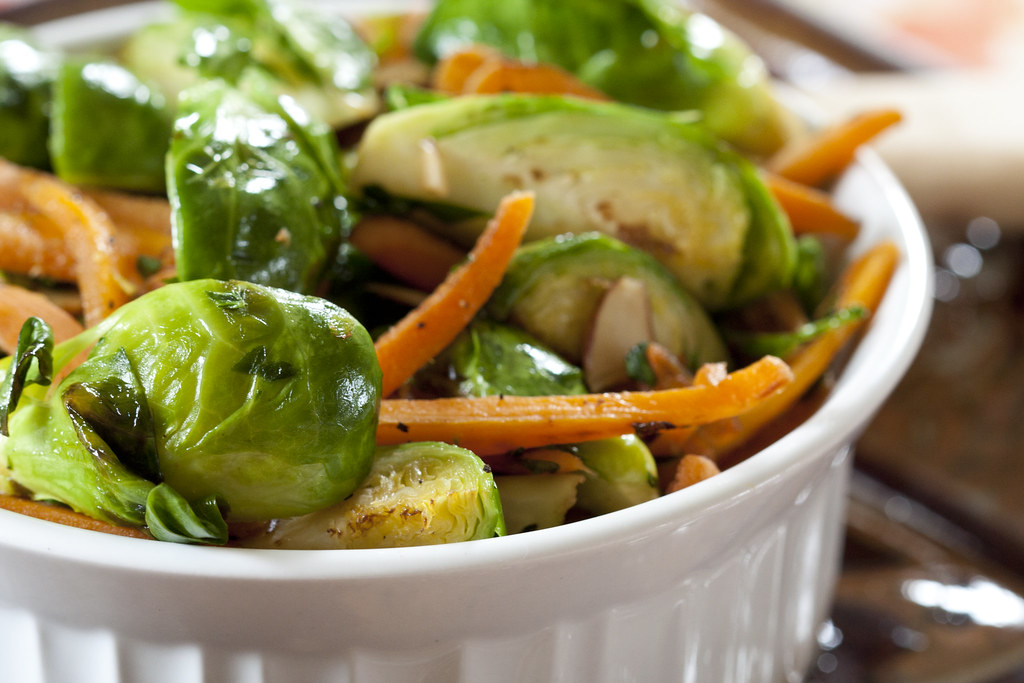
Brussels sprouts, we felt they tasted very similar to cooked broccoli. The carrots, almonds, and tad bit of brown
sugar really pulled this side dish together by creating an ever so faint sweet
taste. The verdict: give Brussels
sprouts a try!
This past weekend marks a very special date for me. Exactly one year ago today I created Red Lab
27. I always thought it would be fun to have
a blog, but I never knew what to write about.
Luckily at that time there were many new changes happening in my
life. My new job brought me a different
city to explore and eventually I stumbled upon the local library. Checking out cookbooks was much more fun than
buying them, plus there was an endless supply.
With all the new dishes I was making, I finally had a subject to write
about. As an added benefit, I knew that
if I had my own blog, my tech savvy husband would be so proud.
Trying a new recipe each week and blogging about it has become
a true passion of mine. Because of Red
Lab 27, I’ve made new connections and friends.
I can’t begin to explain how rewarding it is when followers I don’t know
leave comments on my site about a recipe they’ve tried! More
than anything I love inspiring people to cook.
You don’t have to be a professional chef to produce amazing dishes at
home. I’m by no means a pro, but in the eyes
of my husband I am, and that’s what counts!
For Red Lab 27’s one year anniversary I wanted to make one
of my favorite dishes. But which
one?! That’s when I realized I hadn’t
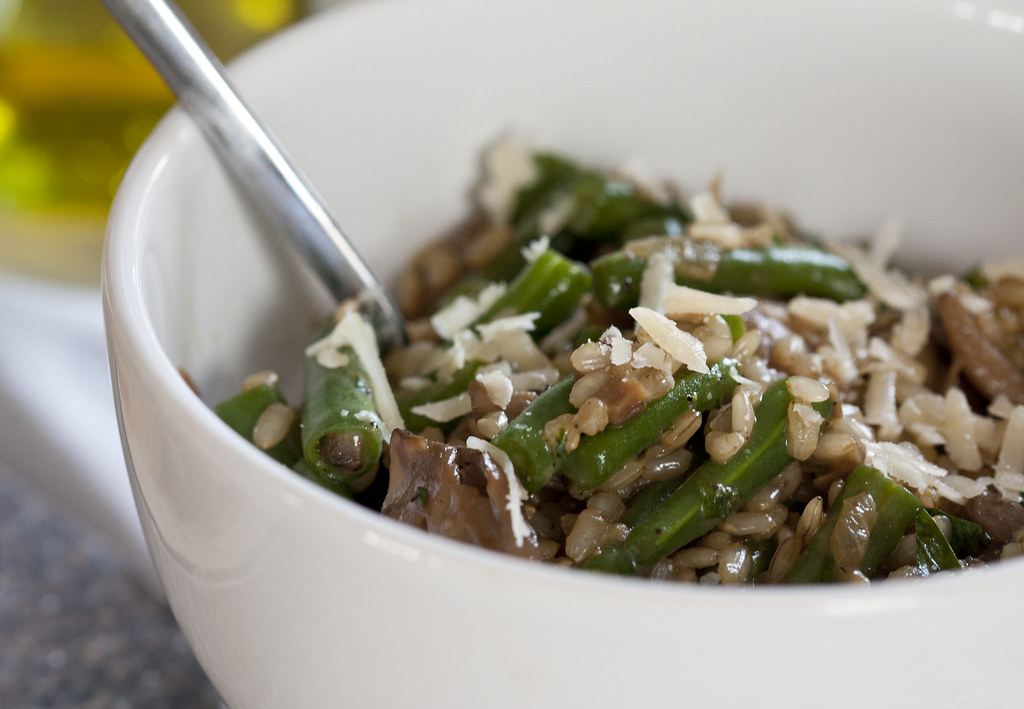
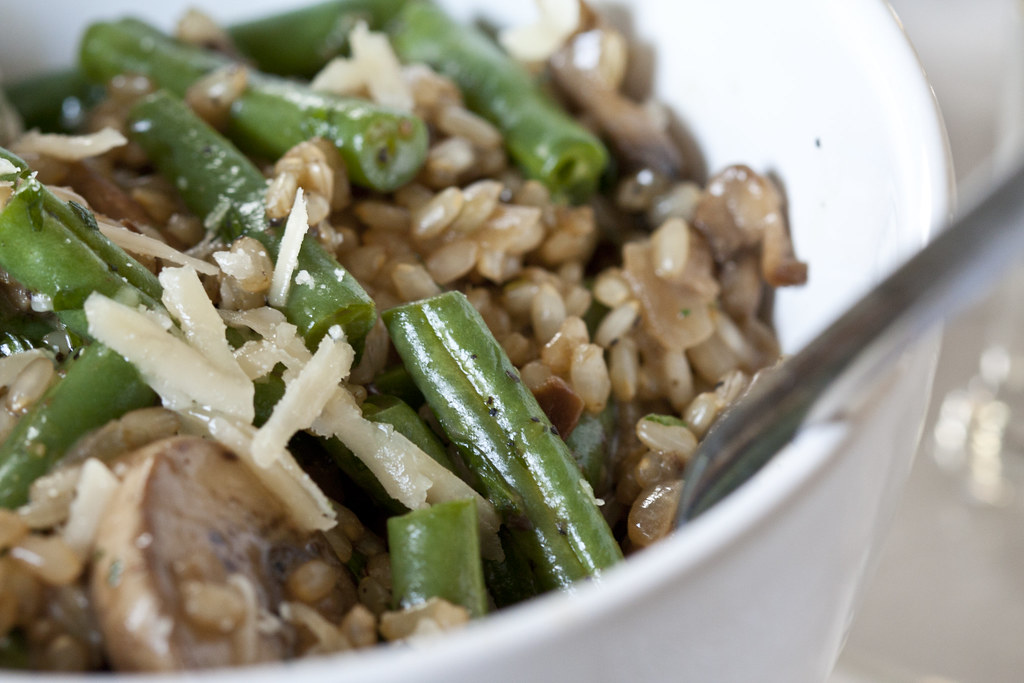
shared this recipe for Mushroom & Green Bean Risotto! If you’ve never tried Risotto it’s a popular
Italian dish made of rice, that’s cooked in broth, to a creamy consistency. Y-U-M!
Please be forewarned that this dish takes time. It’s not hard, it just takes patience. At the very end you’ll find yourself standing
by the stove, stirring for a half hour, as the broth is slowly absorbed into
the rice mixture. The original
directions say to stir constantly.
What?! The first time I made this
meal I stirred and stirred for the full half hour (no breaks!). However, the 2nd time around I
stirred for a minute, put some dishes away, and continued stirring with little
breaks in between. This worked just as
well and didn’t affect the taste.
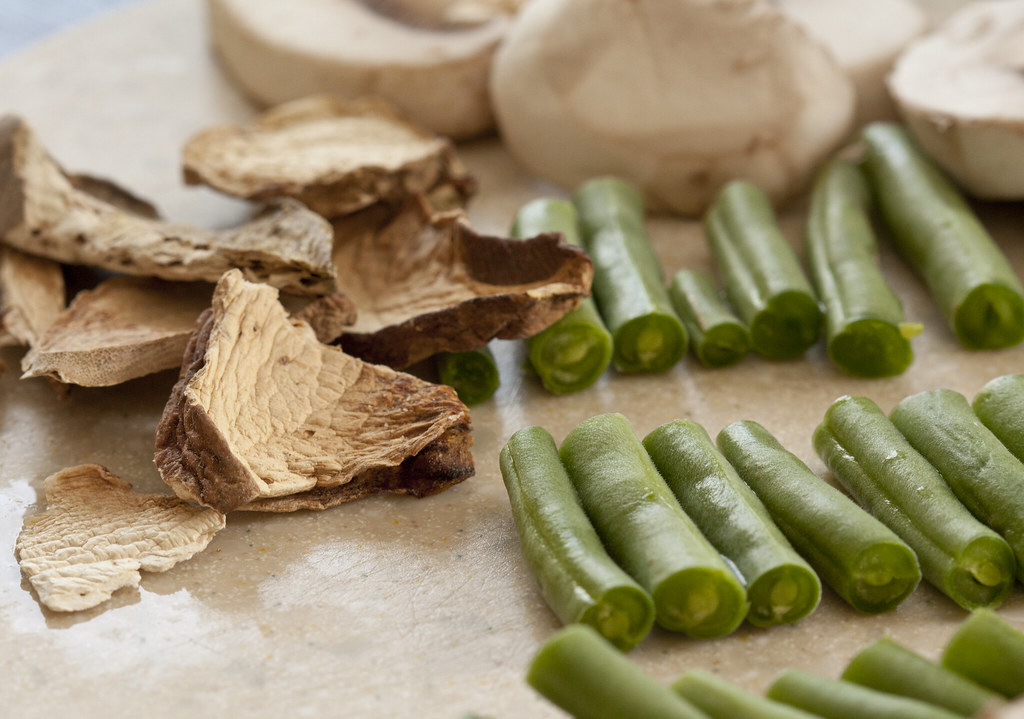
Fresh green beans and mushrooms
Before you begin this dish, you may be wondering where to
find a few of the ingredients. Dried
porcini mushrooms can be found in the produce section of your grocery
store. Dried mushrooms are typically kept
refrigerated, near the fresh mushrooms. I had to spend some time searching for the
short-grain rice. Who knew there were so
many kinds of rice lengths! But it’s
very important to buy short-grain rice, as it easily absorbs liquid and will
cook more quickly. I used gluten free, Lundberg Short Grain Brown Rice. Also, do not cheat and buy Kraft Parmesan Cheese. Buy
real Parmigiano-Reggiano cheese and grate it yourself. Freshly grated Parmigiano-Reggiano is
absolutely amazing! There's no comparison. Trust me, if you put
in the effort to make this dish, you want to properly finish it. This cheese is a little more expensive (approx.
$10 for a block) and can be found near the fine cheeses.
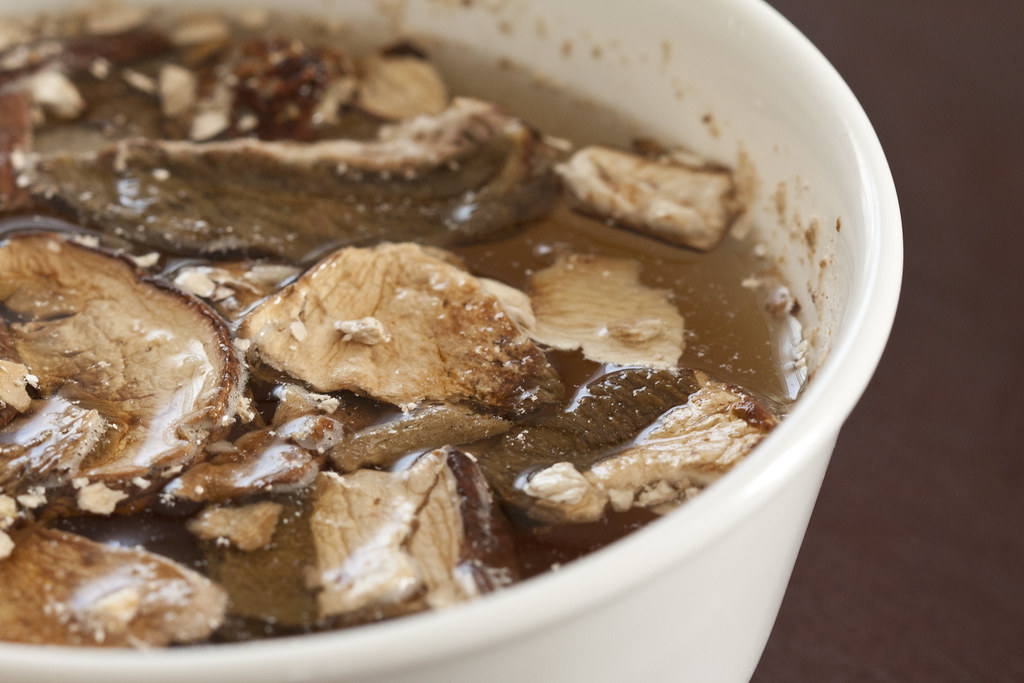
Soaking the dried porcini mushrooms
This dish is sinfully delicious and has become one of our regulars
now. My husband described it as a “techno
party” in his mouth. While I was taking
the pictures for my blog, we couldn’t contain ourselves and were sneaking bites
here and there, until the photos were done.
When you take your first bite, your heart will melt and you’ll feel as
if you’re dining at an exquisite Italian restaurant. Also, did I mention that this dish is healthy
too?! Cooking Light provided the
nutritional value of 434 calories in one serving (1 ¾ cup). What a great dinner option! Enjoy!
1/2 cup dried porcini
mushrooms (approximately .5 oz.)
3 cups hot water
2 tablespoons olive oil,
divided
1 pound button mushrooms,
sliced
3 cups green beans (cut into
1 inch pieces)
1/2 teaspoon black pepper,
divided
1/2 cup vidalia onion, minced
1/2 cup white wine
1/2 cup Parmigiano-Reggiano
cheese, grated
1/4 cup fresh flat-leaf
parsley, chopped
2 teaspoons fresh thyme,
chopped
Directions:
Bring a medium saucepan of water to a boil and add 1 teaspoon salt. Stir
in rice. Reduce heat and simmer for 15
minutes. Drain and set aside. Note: Rice
will not be done, this is ok.
Place dried porcini mushrooms in a medium bowl. Cover mushrooms with 3 cups hot water. Let stand for 15 minutes. Using a sieve, drain
over a bowl; reserve liquid. Chop porcini.
Heat 1 tablespoon oil in a large skillet (with tall sides) over
medium-high heat. Add sliced, fresh mushrooms.
Sauté for 8 minutes or until moisture evaporates and mushrooms begin to
brown; stir occasionally.
Stir in chopped porcini, green beans, 1/4 teaspoon salt, and 1/4 teaspoon
black pepper. Cook for 2 minutes or
until the green beans are crisp-tender. Place mushroom mixture in a large bowl
and keep warm.
Return skillet to medium-high heat.
Add remaining 1 tablespoon oil. Sauté onion for 4 minutes or until
tender.
Add rice to the skillet and cook for 2 minutes; stir occasionally. Add
remaining 1/4 teaspoon salt and 1/4 teaspoon black pepper; combine well.
Stir in wine and cook for 2 minutes or until the wine evaporates; stir
constantly.
Add 1/2 cup reserved mushroom liquid to rice mixture. Stir constantly for 3 minutes or until the
liquid is almost absorbed. Repeat until the mushroom liquid is gone (approximately
30 minutes total).
Add grated Parmigiano-Reggiano, parsley, and thyme; stir to combine
well.
If desired sprinkle with
additional Parmigiano-Reggiano cheese before serving. Enjoy!
This past Labor Day weekend was very chilly and there was no question that Fall was in the air. The weather was chilly enough to wear a hooded sweatshirt and have to restrain myself from going to a cider mill and getting warm doughnuts and cider (YUM!). It’s still a little early in the season for the cider mill so I settled on making homemade soup instead. I love creamy soups like Broccoli & Cheddar or Potato, Bacon, & Cheese, but I wanted something a little healthier. One of my favorite soups is Olive Garden’s minestrone soup with fresh out of the oven breadsticks for dipping. This recipe I found online states that it’s a ‘copycat’ of Olive Garden’s minestrone soup. I definitely wanted to try making it!
As you look at the recipe below you may be thinking it looks hard, but don’t sell your cooking skills short. You can easily make this! There’s a long list of ingredients but just prepare yourself by writing a detailed grocery list. There’s nothing worse than getting home and realizing you forgot one item. Also, while you’re at the store, you may be tempted to buy dried basil or parsley, but don’t give in. I used to do this as I thought fresh and dried herbs produced the same taste. WRONG. Not until I began getting into cooking did I understand this. Fresh herbs have a strong, rich flavor and add a lot to a meal by enhancing the flavors. If you want to save yourself a little bit of time, like I’ve mentioned before, buy pre-minced garlic in a jar at the store. I even went as far as buying baby carrots since I wouldn’t have to peel them and only needed to chop them into smaller pieces. Plus, left over carrots serve a nice purpose as they’re a healthy snack to have ready in the fridge.
Fresh Spinach (don't buy frozen!)
Once you’re home and ready to start cooking, most of the work centers around chopping the vegetables and herbs. The best part is when that’s complete you can walk away, with the exception of a few stirs here and there, while the soup simmers for 40 minutes. Let your house drink in the aroma while you decide if you want to go a step further and make homemade breadsticks.
My husband and I ate our soup and breadsticks while we watched one of our favorite tv shows. At first my husband didn’t say anything and I was surprised as I thought the soup was really good. Then out of nowhere he said, “WOW this is really good!” The soup was a hit! It’s very thick and hearty as it has many vegetables and pasta combined in a nice tomato infused broth. I explained how it’s a copycat recipe of Olive Garden’s minestrone soup and he said it was better! The most rewarding part about making this meal is that you will have many leftovers, especially if you're only cooking for 2 people. You won’t get tired of this soup either. The next day, while at work, my husband texted me… ‘Just had some of your soup…It was awesome. Can’t wait for dinner.’ What’s funny is that he knew we were having leftover soup for dinner. Make this soup, you won’t regret it!
4 cups vegetable broth (note: make sure to purchase vegetable broth & not chicken broth)
1 (15 ounce) can red kidney beans, drained
1 (15 ounce) can great northern beans, drained
1 (14 ounce) can diced tomatoes (not drained)
1 (6 ounce) can tomato paste
1/2 cup carrots, chopped
2 tablespoons fresh parsley, minced
1 1/2 teaspoons dried oregano
1 1/2 teaspoons salt
1/2 teaspoon ground black pepper
1/2 teaspoon basil, minced
1/4 teaspoon dried thyme
3 cups hot water
2 cups fresh spinach, chopped
1 cup small shell pasta
Directions:
Chop onion, zucchini, carrots and celery. Finely mince garlic (or use minced garlic from a jar instead). Trim ends off the beans and discard. Cut the beans into approximately 1 inch pieces. Set all vegetables aside.
Finely chop parsley and basil. Roughly chop the spinach into bite size pieces. Set aside.
Heat three tablespoons of olive oil over medium heat in a large pot.
Sauté onion, celery, carrots, green beans, and zucchini in the oil for 5 minutes or until the onions are translucent. Add the garlic during the last 2 minutes.
Add all of the remaining ingredients, except the spinach and pasta, to the pot.
Bring soup to a boil, then reduce heat to low and simmer for 20 minutes.
Add the spinach leaves and pasta shells. Cook for an additional 20 minutes or until desired consistency.
Over the weekend I purchased a steal at a garage sale. A Martha Stewart recipe book for only $1! It’s has some great dinner recipes and really nice pictures that go along with them. As I was browsing through all the recipes I found this one for quinoa salad. I like couscous and quinoa looks very similar so I decided to try it. Right next to the recipe Martha has a description about quinoa. Quinoa is a grain (pronounced “KEEN-wah”) that has a nutty flavor. It’s an excellent source of protein and is the only non-animal protein that contains all the essential amino acids. It’s also rich in iron, calcium, vitamins E & B.
Oddly enough, the hardest part about making this dish is rinsing the quinoa. I know, it sounds very easy right? Wrong. Quinoa is super fine and so small that if you were to rinse it with using a strainer it would fall through. I put the quinoa into a small bowl, poured water on top of it, swirled it around and then became stumped as to how I would strain the water out. I went online to see what type of help I could find and I found a video demonstration that shows how to accomplish this. By using 2 bowls (1 to hold the quinoa and the water, 1 to stain the water) you can separate the grains from the water. You might think, well maybe I’ll just skip rinsing the grains but if quinoa is not rinsed properly before it’s cooked, it will have a bitter flavor. So don’t skip this important step.
Look how tiny the grains are!
The quinoa cooks on the stove for a little while and is supposed to absorb the chicken stock, just like how rice absorbs water when it cooks. I started to panic a little bit as mine did not look like it was absorbing the chicken stock fully, but when I pulled the lid off after it cooked the full time almost all the liquid was absorbed. With the small amount of stock that remained in the pan I just ended up draining it.
The mixture after the water has been absorbed.
More than anything I was excited to find a side-dish so high in protein. I ate the salad at room temperature and I found the flavors pleasing but I’m not quite sure I’d go out of my way to make the dish again. The only flavor I wasn’t sure about was the mint. I can’t say I didn’t like it but I can’t say I liked it either. Overall I think the mixture tasted good and had a really nice texture. I was surprised as I didn’t think Ryan would care for the dish that much but he actually said it tasted good and that it was a nice change. Next time I make this again I would use this recipe as a base and try finding other recipes that include nuts and perhaps dried fruit. I think these additions would make for an even more interesting combination.
I love fresh tomatoes!Whether roma, traditional beefsteak, or grape tomatoes.Oh la la.Juicy, red, ripe tomatoes scream summer time.If you want to experience one of the most
amazing smells just rub the leaves of a tomato plant between your fingers.If only
this scent could be bottled for a pick-me-up during the harsh winter months!
Our fridge is always stocked with cool, crisp, cherry
tomatoes in the summer.They make a refreshing
snack by themselves, but I’ve found a great way to kick them up a notch. To turn them into a crowd pleaser, simply pair
them with fresh basil and mozzarella.This combination belongs together like butter and popcorn.
The best part is that you can assemble these appetizers for
a party in 15 minutes.They look fancy,
but putting them together is cinch.All
you’ll need is long decorative toothpicks (sandwich or cocktail size; like these), cherry tomatoes, fresh basil, and bocconcini.If you’re wondering what ‘bocconcini’ is, it’s
fresh mozzarella that’s packed in water.It sounds odd, but wow the taste is amazing.You can find this cheese at your local
grocery store next to the fresh, premium cheese.They’re shaped in small balls (think the size
of a grape tomato) that you’ll simply cut in half for this recipe.
Once you have all the ingredients just follow the steps
below as these couldn’t be easier to put together.When you’re done, it will look like you slaved
in the kitchen perfecting these.That’s okay, let your guests think that!Trust me, these one bite wonders will go
fast.It might be a good idea to plan on
making two batches!Enjoy!
Ryan and I love Mexican food, so I thought we could try making a healthier version of quesadillas.I’ve come across vegetarian recipes for quesadillas and when I saw this one, I thought it sounded pretty good.Plus Ryan and I just bought our own tortilla press!I’m going to attempt to make homemade corn tortillas (the authentic Mexico kind) soon. I figured if we like this recipe then I can make it down the road when I’ve mastered the tortillas.
The quesadillas cooked to perfection and came out a wonderful golden brown color.Ryan and I both agreed they tasted quite good and wouldn’t mind adding these into our weekly meals.The filling had a really nice texture and in all honestly I didn’t miss having meat.I found that I enjoyed the spinach and mushrooms incorporated into the filling but because there was such a small amount the flavors weren’t very prominent.When I make this dish again, I plan to double the amount of spinach and mushrooms.
1 (15 1/2 ounce) can black beans, drained and rinsed
1 (10 ounce) can whole kernel corn, drained
1/4 cup fresh spinach, chopped
1/4 cup fresh mushrooms, sliced
1 tablespoon brown sugar
1/4 cup salsa
1/4 teaspoon red pepper flakes
8 (8 inch) flour or whole wheat tortillas
1 1/2 cups shredded monterey jack cheese, divided
salsa, for garnish
sour cream, for topping if desired
Directions:
Heat 2 teaspoons oil in a large saucepan over medium heat. Add onion, spinach, and mushrooms cooking until softened; about 2-3 minutes.
Stir in beans and corn.Then add sugar, salsa, and pepper flakes; mix well. Cook until heated through, about 3 minutes.
Drizzle oil in a large skillet (enough to lightly coat the bottom) over medium heat. Place a tortilla in the skillet and sprinkle evenly with cheese.Spoon bean mixture on top of cheese and again sprinkle with cheese.
Place another tortilla on top.Cook until golden then flip and cook the other side. Repeat process with remaining tortillas and filling.




 ), cherry tomatoes, fresh basil, and bocconcini.


