Showing posts with label vegetables. Show all posts

Monday, August 6

Tomato Chickpea Salad

In the summer there always seems to be an abundance of tomatoes at our house.  We have a small garden with a few kinds, but we also try different varieties from our farmers market.  I love having fresh tomatoes readily on hand to garnish sandwiches and burgers or to simply eat cherry tomatoes as a quick snack.  


Since we have a stock supply of tomatoes, I have a basil plant that I keep on my back porch for easy picking.  Fresh basil has a wonderful flavor and pairs extremely well with tomatoes.  Taking all this into account, you can say I’ve gotten pretty creative with tomato recipes.  My favorite snack or appetizer has to be Tomato, Basil & MozzarellaPoppers.  But this week I discovered a new dish from a recipe I found on Pinterest.  This is a cold, refreshing side dish that you can serve with just about any meal.  And the best part is it’s extremely easy to put together.  

Garbanzo Beans/Chickpeas

The key ingredients are grape tomatoes, garbanzo beans (chickpeas), and basil.  Keep in mind that you can always cut whole tomatoes into bite size pieces if you don’t have grape tomatoes accessible.  If you’re not familiar with chickpeas, they have a mild nutty flavor and are rich in minerals.  They’re quite popular in vegetarian dishes as they’re an excellent source of protein.  Just one cup of chickpeas contains 29% of your recommended protein intake.  If that doesn’t entice you, just know that this salad is healthy and will leave you feeling invigorated.  Give it a try during these hot summer months.  After all, it’ll only take you 10 minutes to assemble.


Tomato Chickpea Salad
Adapted from Green Lite Bites blog
Serves: 4 to 5 people
Prep Time: 5 minutes
Total Time:  10 minutes

Ingredients:
  • 1 (15.5 oz.) can garbanzo beans (chickpeas)
  • 1 pint grape tomatoes
  • 25 large basil leaves
  • 1 ½ teaspoons garlic, minced
  • 1 tablespoon red wine vinegar
  • 1 tablespoon apple cider vinegar
  • 2 teaspoons olive oil
  • 1/2 tablespoon honey
  • pinch of salt

Directions:
  1. Drain chickpeas and rinse in a strainer to remove the starch.  Place in a large bowl.
  2. Chop the basil and cut the tomatoes in half.  Add to the bowl and combine with the chickpeas.
  3. Add remaining ingredients to the bowl.  Stir to combine well.
  4. Refrigerate for 30 minutes before serving.  Serve cold.

Sunday, March 11

Brussels Sprouts with Carrots & Almonds

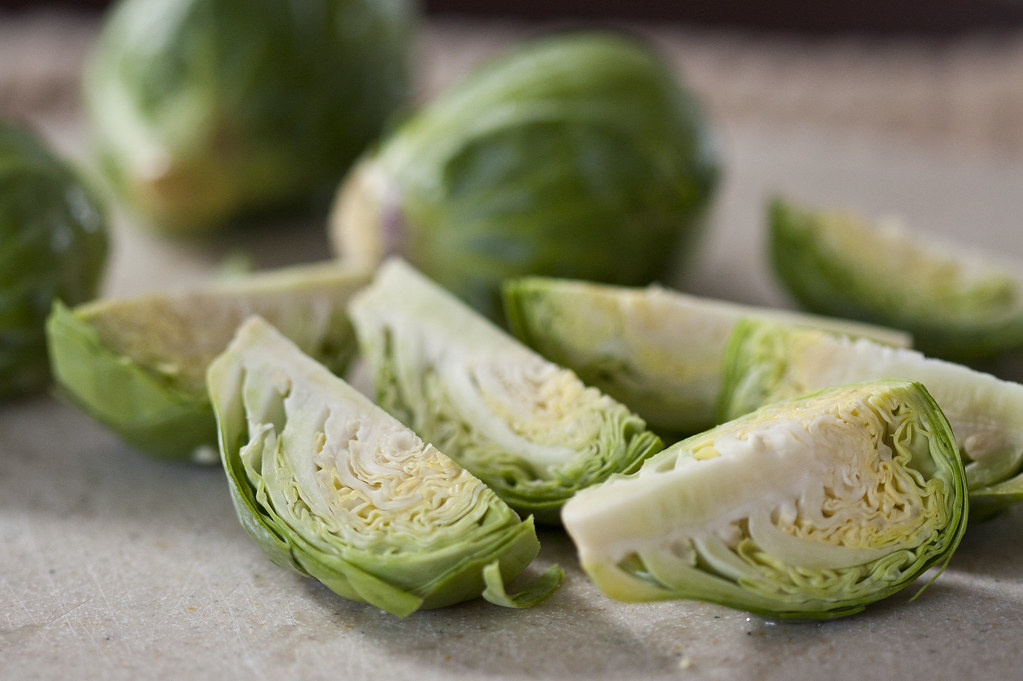
Many times I find myself deciding what type of side dish to make with dinner.  With summer quickly approaching, as well as my birthday (the big THREE O), my husband and I have vowed to eat healthier and exercise more.  This helps narrow our selection.  Or maybe ‘narrow’ isn’t the right word.  I’ve found that you can eat a lot of vegetables for not very many calories at all.  I guess you could say this is a learning experience and has opened new doors for me.  There are so many vegetables we’ve never tried.  For instance Brussels sprouts.

I know what you’re thinking….yuck!  Isn’t that the vegetable that everyone despises?  The one that causes kids to turn their noses up in disgust?  Yes, that’s the one I’m talking about.   I thought those same exact things myself.  Actually, I’m not quite sure why I didn’t move onto the next recipe when I stumbled across this one.  Ohhh I remember what caught my attention.  One serving size of this dish is only 84 calories.


I decided to give Brussels sprouts a try.  Okay, I admit I wasn’t brave enough to eat them alone. I enjoy carrots and almonds which is why I thought this recipe would be perfect for easing me into Brussels sprouts.  Plus, as I searched online, I learned that Brussels sprouts offer some great health benefits.  Not only do Brussels sprouts help lower cholesterol, but they also help fight against cancer and even prevent some forms of cancer.  What else?  They are extremely high in Vitamin K (one cup contains 273.5% of the recommended dietary allowance).  They’re also a great source of Vitamin C (one cup contains over 161% of the recommended dietary allowance).  


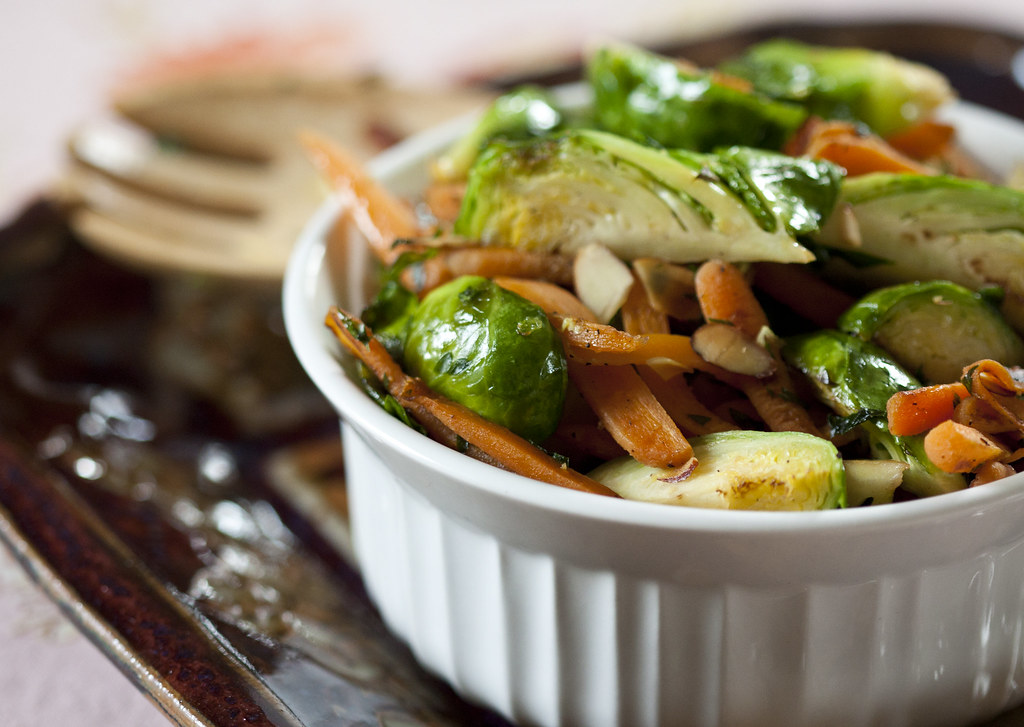
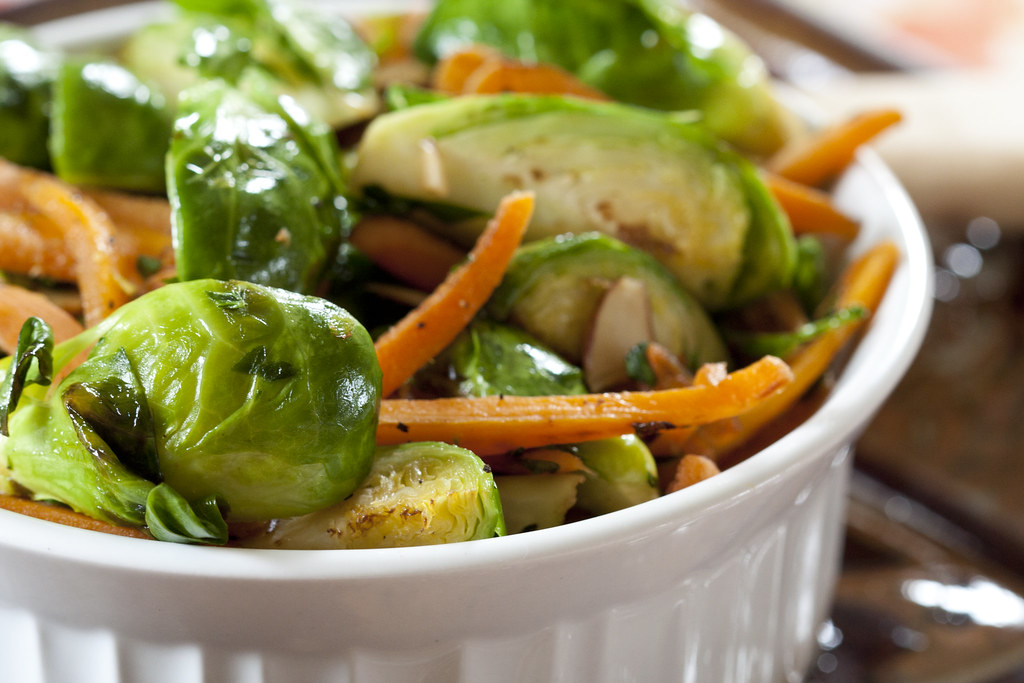
With all of the above health benefits, how could we go wrong with this dish?  I made it to go along with one of our favorite salmon dinners (Honey Mustard Glazed Salmon) and we were quite surprised.  Never having experienced Brussels sprouts, we felt they tasted very similar to cooked broccoli.  The carrots, almonds, and tad bit of brown sugar really pulled this side dish together by creating an ever so faint sweet taste.  The verdict: give Brussels sprouts a try!


Brussels Sprouts with Carrots & Almonds
Servings:  4
Prep Time:  10 mins.
Total Time:  20 mins.

Ingredients:

  • 1 tablespoon butter
  • 1 1/2 cups (2 inch) julienne-cut carrot
  • 3 cups Brussels sprouts, quartered
  • 2 tablespoons fresh parsley, minced
  • 1 tablespoon sliced almonds, toasted
  • 1 teaspoon brown sugar
  • 1/4 teaspoon salt
  • 1/8 teaspoon black pepper


Directions:

  1. In a large nonstick skillet melt butter over medium heat. Add carrots; sauté 4 minutes.
  2. Add Brussels sprouts; sauté 5 minutes or until crisp-tender.
  3. Add parsley, almonds, brown sugar, salt, and pepper.  Stirring constantly, cook until    the sugar melts (approximately 30 seconds).


Sunday, November 13

Roasted Fingerling Potatoes

Recently I took a cooking class at the Birmingham Community House which happens to be right across the street from where I work.  How convenient!  I highly recommend checking to see if your city, or a nearby city, has a community center.  They offer all sorts of classes (exercise, cooking, foreign language, dance, etc) at very reasonable prices.  The class I took was called Quick & Easy Weeknight Meals.  The 2 hour class cost $36 and during that time we made 7 different meals and side dishes.  The best part is we were able to sample ALL of them.  YUM!!! 

This is a recipe for one my favorite sides that we tried, Roasted Potatoes.  We paired it with flank steak and these potatoes tasted divine!  This is such a simple recipe too.  The only thing you’ll find hard about assembling this dish is waiting 45 minutes while the potatoes cook in the oven.  They taste so wonderful when they come out of the oven and I am in complete agreement with our teacher who said “Why would you make French fries (implying the frozen kind) when you could make these instead? “

You can make roasted potatoes using traditional Yukon Gold, Idaho, or redskin potatoes but this recipe, including the cooking time, is specifically for Fingerling potatoes.  Until this class I had never heard of fingerling potatoes.  Fingerlings are different varieties of potatoes (French, Russian Banana, and Purple Peruvian) that grow small and narrow.  Because of their shape and size, they are perfect for roasting.  These potatoes aren’t easy to find in grocery stores though.  Our teacher told us Costco sells them, however I thought I might save myself a trip and check my normal grocery store (Meijer).  Unfortunately they didn’t carry them.  I think higher end grocery stores may carry these, but if you don’t feel like searching, Costco sells a 5 lb. bag for $6.99.  

Five pound bag of Fingerlings from Costco


The various shapes, sizes, and colors of Fingerlings
One of the most important things you’ll need to remember when making this side dish is to cut the potatoes into similar bite size pieces.  This will ensure all the potatoes cook evenly.  Otherwise you’ll have some potatoes that are mushy (over done) while others are cooked just right.  For the most part all you’ll need to do is cut the fingerlings in half.  However you’ll find that some are long and narrow while others are short and fat.  Because of this, you may need to cut a short and fat potato into quarters, while the long and skinny potatoes are halved.  This will help keep the thickness of the potatoes consistent.


When all the potatoes are sliced, you’ll need to cover them with oil and herbs.  I find that 1 tablespoon of olive oil is perfect for around 2 lbs.  You’ll want to make sure that the potatoes are evenly coated with olive oil but not swimming in it.  You may need to buy some Mrs. Dash seasoning if you don’t have any at home, but this can be found at any grocery store.  Also, you can use regular salt for these, however I find that using freshly ground sea salt really takes these up a notch.  The stores even sell sea salt  that is already packaged in a grinder.  These range from $2-4 and are sold right in the baking aisle next to all the other herbs and spices.  Below is a picture of the one I purchased at Meijer.  Once the cap is removed, the grinder works by simply twisting the top.


When the potatoes are ready to bake, use parchment paper to line a sheet pan.  Parchment paper is different from wax paper.  I previously thought they could be interchanged.  Not so much.  If you don’t have parchment paper in your house, buy a roll.  It’s super handy.  It will save your prized possessions from sticking to the pan and save YOU some scrubbing work afterwards.  When the potatoes are placed on the pan, the skin side should face down on the parchment paper while the inside of the potato faces upwards.  This will ensure the potatoes cook evenly. 

Ready to put in the oven

Enjoy!  I know you’ll love these just as much as we do.  The best part about serving these potatoes as a side is that you can pair them with a fancy dish such as steak or with something as simple as a turkey sandwich, like we did today!


Roasted Fingerling Potatoes
Adapted from Roasted Potatoes recipe by Chef Pam Gustairs (Birmingham Community Center)
Serves 4-6
Prep Time: 10 mins.
Total Time:  60-65 mins.

Ingredients:
  • 2-3 pounds Fingerling potatoes
  • 1-2 tablespoons extra virgin olive oil
  • 1-2 cloves garlic, minced (optional)
  • 1/2  teaspoon Mrs. Dash Original Blend (salt -free) seasoning
  • 1 -2 pinches regular salt OR 1-2 cracks of freshly ground sea salt

Directions:
  1. Pre-heat oven to 350˚F.
  2. Wash potatoes (peel if desired) and cut into similar bite size pieces.
  3. Place potatoes in a medium bowl and add minced garlic.  Toss.
  4. Add olive oil and toss potatoes to coat evenly. 
  5. Add Mrs. Dash seasoning and salt.  Toss to coat all potatoes.  Tip:  Sprinkle the seasoning and salt high above the bowl instead of directly on top of the potatoes.  This ensures the seasoning will ‘sprinkle’ and not ‘clump’.
  6. Line a sheet pan with parchment paper.  Dump potatoes onto the pan and arrange so that all potato skins are facing down on the parchment paper. 
  7. Bake for 45-55 minutes or until potatoes are golden brown and tender.


Thursday, June 16

Dry-Rubbed Salmon with Cucumber Relish

I came across this recipe for Salmon in one of the library cookbooks that I checked out.  I have heard of dry-rubbed ribs, but I’ve never heard of dry-rubbed salmon.  It sounded easy since all the ingredients for the rub were just spices and seasonings.  When I saw the fish was topped with a cucumber relish (what a perfect summer dish!) I decided it was definitely worth trying. 

The ingredients for the salmon couldn’t get any easier.  You may have to buy some of the spices if you don’t use these ones often, but fortunately I was luckily and had everything on hand except for dried thyme.  Please keep in mind the original recipes serves 4.  I didn’t want to mess with halving tablespoons and ¼ teaspoons, so instead I made the full amount of spice mixture.  We had large, thick salmon fillets (1lb. split between the 2 of us) and when I covered the fillets with the spice mixture I almost used the full amount.  The little that I had left, I discarded.


Before placing the fillets onto the pan make sure you line your pan with foil and lightly coat it with butter.  I found this is a great way to cook fish in the oven and it’ll help save a lot of clean up time afterwards.   When the salmon is coated with the dry-rub mixture place the fillets on the pan and begin broiling.  You can then begin to make the cucumber relish as it’s just enough time to prepare while the fish cooks.  


As a side, I served quinoa (previously featured recipe) with this meal.  I know I say this a lot, but when everything was ready, I really thought it looked like a dish you’d be served in a restaurant.  I was excited to try it and had high hopes because while it was cooking Ryan kept telling me how good it smelled.  This was definitely a winner in our house.  I tried a bite without the relish and thought the salmon tasted great alone.  You’ll notice the mixture has some spicier elements but the brown sugar adds a nice hint of sweetness to balance it out.  Paired with the cucumber relish, I thought they were a great combo and made for a really nice summer meal.  Ryan really liked this dish too.  At one point he said “It’s like fireworks in my mouth!”.  It seemed as if the dish got even better as he continued to eat, as the compliments got even sweeter.  Ending with a smile and…“Babe you’re an amazing cook.”


Dry-Rubbed Salmon with Cucumber Relish
Adapted from The Best of Cooking Light Everyday Favorites: Over 500 of Our All-Time Greatest Recipes ,by the Editors of Cooking Light Magazine (Amazon affiliate link)
Serves: 2
Prep Time: 10 mins.
Total Time: 25-30 mins.

Dry-Rub Ingredients:
  • 1 tablespoon brown sugar
  • 1 teaspoon garlic powder
  • 1 teaspoon dried oregano
  • 1 teaspoon ground cumin
  • 1 teaspoon chili powder
  • 1 teaspoon paprika
  • 1/4  teaspoon salt
  • 1/4 teaspoon dried thyme
  • 2 salmon fillets

Cucumber Relish Ingredients:
  • 1 cup cucumber, chopped
  • 1/2 cup red bell pepper, chopped
  • 1/4 cup onion, diced fine
  • 1 tablespoon chopped fresh mint
  • 1 tablespoon cider vinegar
  • 1/4 teaspoon salt

Directions:
  1. Preheat broiler to 400˚F.  Line a jelly roll pan with tin foil and lightly with butter to prevent sticking.
  2. Combine all of the dry-rub ingredients (except the salmon).  Mix thoroughly.  Sprinkle and pat spice mixture on top & sides of salmon fillets until covered thoroughly.  Discard remaining spice mixture.
  3. Place fish on jelly roll pan and broil for 8-10 minutes (thin fillets) or 12-14 minutes (thick fillets).  Fish should flake easily with a fork when ready.
  4. While fish is broiling combine all cucumber relish ingredients.
  5. When ready, serve fish fillets topped with cucumber relish.

Sunday, June 5

Tomato, Basil & Mozzarella Poppers

I love fresh tomatoes!  Whether roma, traditional beefsteak, or grape tomatoes.  Oh la la.  Juicy, red, ripe tomatoes scream summer time.  If you want to experience one of the most amazing smells just rub the leaves of a tomato plant between your fingers.    If only this scent could be bottled for a pick-me-up during the harsh winter months!

Our fridge is always stocked with cool, crisp, cherry tomatoes in the summer.  They make a refreshing snack by themselves, but I’ve found a great way to kick them up a notch.   To turn them into a crowd pleaser, simply pair them with fresh basil and mozzarella.  This combination belongs together like butter and popcorn.  


The best part is that you can assemble these appetizers for a party in 15 minutes.  They look fancy, but putting them together is cinch.  All you’ll need is long decorative toothpicks (sandwich or cocktail size; like these), cherry tomatoes, fresh basil, and bocconcini.  If you’re wondering what ‘bocconcini’ is, it’s fresh mozzarella that’s packed in water.  It sounds odd, but wow the taste is amazing.  You can find this cheese at your local grocery store next to the fresh, premium cheese.  They’re shaped in small balls (think the size of a grape tomato) that you’ll simply cut in half for this recipe.  


Once you have all the ingredients just follow the steps below as these couldn’t be easier to put together.  When you’re done, it will look like you slaved in the kitchen perfecting these.   That’s okay, let your guests think that!  Trust me, these one bite wonders will go fast.  It might be a good idea to plan on making two batches!  Enjoy!  


Tomato, Basil & Mozzarella Poppers
Original recipe by Alissa Hebert
Serves: 24
Prep time: 5 minutes
Total time: 15 minutes

Ingredients:
  • 24 cherry tomatoes
  • 24 fresh basil leaves
  • 1 (8 oz.) tub bocconcini (fresh mozzarella)
  • 1 tablespoon olive oil
  • 1 teaspoon balsamic vinegar
  • 1/8 teaspoon salt
  • 1/8 teaspoon pepper

       Directions:
     
  1. Drain water from cheese tub and cut cheese balls in half (or to preferred size).
  2. Assemble in this order on the toothpick: tomato, basil leaf (folded in half & pierced through middle), bocconcini.
  3. In a small bowl combine olive oil, vinegar, salt, and pepper.  Stir to combine.
  4. Use a spoon or cooking brush to lightly drizzle or brush olive mixture onto the assembled poppers.
  5. Refrigerate and serve cold.

Saturday, May 14

Mini Turkey Meatloaves w/ Honey Garlic Sauce - Baked Sweet Potatoes

Ryan and I have been incorporating turkey a lot more into the dishes we make. It’s supposed to be healthier than red meat and we actually enjoy the taste of it. Sometimes we can’t even tell the difference when we’ve substituted it for ground beef.

Ryan likes meatloaf and I think I’ve made it one time for us during the 8 years we’ve been together. When I stumbled across this recipe for turkey meatloaf, especially since it has mini loaves, I thought now’s the time to try making meatloaf again. And of course I was sold on the honey garlic sauce. One of the other main selling points to this recipe is that the mini loaves can be frozen after they’re baked (much cleaner and easier than one large loaf).

I wanted to make a side to go along with this dish so I chose to make baked sweet potatoes. At first I was going to make one baked potato for each of us until I found the recipe below for baked, bite size sweet potatoes with seasonings.

The meatloaf recipe calls for some ingredients that I would not expect to find in a traditional meatloaf, however I guess you could say that this meatloaf has a twist. One of the ingredients that really threw me for a loop were the water chestnuts. These did not sound appetizing to me at all, especially in meatloaf. After reading online reviews, I noticed many people left out the water chestnuts and instead substituted diced carrots. I came super close to substituting with carrots, however at the very last minute I decided to stick with the original recipe and use the water chestnuts. You’ll notice that another ingredient is evaporated milk. This type of milk is sold in a can and can be found down your grocers baking aisle. 


The steps for assembling the meatloaf are easy as everything is combined together and put into muffin tins. I altered the recipe a little bit so that it contains less sodium. Many of the reviews complained the original dish was too salty and offered their suggestions of how to fix this, which I followed. When everything is combined, you’ll notice the mixture is very wet. This is okay, this is what makes the mini loaves so moist. There is one thing I must warn you about….DON’T fill the muffin tins to the top. I thought I’d fill them to the top so I wouldn’t have to dirty another pan, and I regret that decision. When the loaves were baking, they started to overflow a little and some of the grease dripped in the oven. I ended up putting a baking sheet on the shelf below the muffin tin so that it would catch the dripping. All this can be solved by filling the tins ¾ of the way full. My muffin tins might have been a little on the small side too, which is why they may have overflowed. In the end I had some very messy tins (fingers crossed they come out of the dishwasher nice and clean). There’s a tip I learned on TV, after the fact, that would have been helpful in this situation. Grease the top of a muffin tin with some oil before putting into the oven. This way if muffins or whatever you’re cooking overflows it will be very easy to clean the pan as the extra/overflow can just be wiped away. 

  
The potatoes were super easy to make as well. Just be careful when cutting the sweet potatoes. They’re tougher to cut through and the knife can easily slip. I actually had my first accident in the kitchen because of this and sliced the top of my index finger. I kind of panicked when it didn’t seem to stop bleeding under the water. Luckily Ryan was at home so I was able to yell for him to come help me. In the end it was okay, but now I’m going to be much more careful when cutting. 


When everything was finished cooking, and I put together the dinner plates, they looked amazing! Even Ryan, who didn’t know what I was making, was impressed by how tasty they looked. We dug in and both agreed the mini turkey loaves were very good. They were very moist and the sauce tasted excellent on top of them. I also proved myself wrong. The water chestnuts were a great addition to the meatloaf. I didn’t taste their flavor, however they added a really nice texture to the meatloaf. The potatoes tasted very nice as well and were a great side dish to have with meatloaf. 


Mini Turkey Meatloaves with Honey Garlic Sauce

Adapted from Recipe #57770 by * Pamela *, food.com
Yields: 12 mini loaves
Prep time: 15 mins.
Total time: 45 mins. 

Ingredients:
  • 1 1/2 lbs ground turkey 
  • 1/3 cup water chestnut, chopped fine
  • 3/4 cup fine breadcrumb
  • 2/3 cup evaporated milk
  • 3 tablespoons lite or reduced sodium soy sauce
  • 1/4 cup green onion
  • 1 egg
  • 1 teaspoon low-sodium instant chicken bouillon*
  • 1 garlic clove, minced 
 *These are not bouillon cubes, these come in a jar and are ground up granules 

Honey Garlic Sauce:
  • 1/3 cup ketchup
  • 1/3 cup honey
  • 2 tablespoons lite or reduced sodium soy sauce
  • 1/2 teaspoon garlic

Directions:
  1. Combine all meatloaf ingredients into a large bowl.
  2. Mix with large spoon to thoroughly blend. Don’t use a mixer this as the mixture will become too fine.
  3. Divide mixture into ungreased muffin/cupcake tins. Fill only ¾ of the way full.
  4. Bake at 350˚F for 30-35 minutes.
  5. During the last 10 minutes that the loaves are cooking, combine all sauce ingredients in a small sauce pan. Cook and stir on low heat until hot and bubbly.
  6. When loaves are done, remove from pan and serve with honey garlic sauce
  7. Note: If you’d like to freeze some of the loaves, wait until they have cooled before placing into a Ziploc bag to freeze.

Baked Sweet Potatoes

Adapted from recipe by Jenncook, allrecipes.com
Serves: 3
Prep time: 10 mins.
Total time: 1 hour 10 mins.

Ingredients:
  • 2 tablespoons olive oil
  • 2 large sweet potatoes
  • 2 pinches dried oregano
  • 2 pinches salt
  • 2 pinches ground black pepper

Directions:
  1. Preheat oven to 350˚F. Lightly coat the bottom of a glass or non-stick baking dish with olive oil.
  2. Wash the sweet potatoes. Skins can be left on, but if preferred without skin, peel. Cut into medium bite size pieces.
  3. Place cut sweet potatoes in the baking dish and toss with spoon until they’re coated with some of the olive oil.
  4. Sprinkle the oregano, salt and pepper over the potatoes (tossing potatoes while sprinkling to coat).
  5. Bake for 60 minutes or until soft.

Saturday, April 9

Lavender & Honey. Can it get any better?

Wow when I came across this recipe in a cookbook I didn’t really see much else past ‘Lavender Honey Sauce’.  I’m a sucker for honey and can you believe I already had lavender honey in my kitchen?!  How perfect!  Ryan and I went to a really tasty restaurant in Novi called Toasted Oak Grill & Market.  We had an amazing appetizer with all different kinds of cheeses, game meat, nuts, pickled grapes and incredible sauces to compliment everything.  One of the sauces was a bacon caramel sauce (yes, it was great), but the one I really enjoyed was lavender honey.  I suppose you can find lavender honey at a farmers market but I’ve never looked as I hadn’t thought beyond the realm of traditional honey.  I was in luck, though, as the restaurant had a store inside where they sold their wines, meats, cheeses, and sauces!  I purchased a small mason jar of lavender honey for only $7.  I thought that was a pretty good deal.  I hadn’t opened the honey yet as I didn’t want to waste it on just any recipe.   Then I stumbled upon this dish and I knew I had to make it.


The fish recipes that I recently cooked have mostly been salmon so I was open to trying a new variety of fish.  The original recipe for this dish calls for Grouper however I’ve changed it to Tilapia.  I didn’t know what type of fish Grouper was, but I figured Meijer would have it in their fresh fish section.  I was wrong.  The attendant at the seafood counter wasn’t very familiar with Grouper and said it might be more of a seasonal fish.  I decided the next best white fish to use would be Tilapia.   While you’re buying fish and the remaining ingredients at the store, look for shelled pistachios.  Buying pistachios that are shelled is a huge time saver.   I don’t mind de-shelling pistachios, but the recipe calls for 5 tablespoons and I remembered that I had seen shelled pistachios at Costco not too long ago.    Costco carries a very large bag of shelled pistachios that costs around $20.  I didn’t want to have pistachios in our household forever so I decided to see if Meijer carried them but in a smaller quantity.  As I went down the nut aisle I searched high and low but did not find any.  I was bummed and finally decided to put the bag of regular pistachios in my cart.  As I was leaving the aisle, and passing the bulk section, right across from the bulk nuts were shelled pistachios!  Meijer’s had a bag that was about the half size of Costco’s for $10.  


As you read the ingredient list, you’ll notice that bread crumbs are incorporated into this recipe.  One of the tips I would offer is to make your own bread crumbs.  It’s easy and I think they taste much better than buying a can of bread crumbs. Bread crumbs from the store are very condensed and have a good amount of seasoning added to them. When you make your own bread crumbs they tend to have a lighter and fluffier texture.  I made mine awhile ago when I baked a large loaf of bread that we weren’t going  to finish.  After the bread sat for a few days I used my food processor to grind the bread pieces to crumbs while adding my own seasonings.  You can freeze bread crumbs as well so that they don’t spoil.  I put mine in a large Ziploc bag and froze them.  Now whenever a recipe calls for bread crumbs I pull them out of the freezer, pour what I need, and put them back.  Keep in mind you can make bread crumbs from any loaf of bread, not just homemade bread.  In addition to using my own bread crumbs I also combined them with Panko bread crumbs.  Panko is a variety of flakey bread crumbs that are used in Japanese cuisine.  The traditional recipe does not call for both types of crumbs, however I was very pleased with the results, so if you’d like to try this modification I’ve made a note in the recipe below.

As I was preparing the fish I had an accident in the kitchen that I thought might ruin this dish.  I was practically out of pepper and as I was pouring it out of the container I held it over the fish.  I didn’t think I’d have enough pepper so this would ensure any extra would fall onto the fish and not be wasted.  Well it turns out I had plenty.  As I tipped the pepper over (practically vertical) to try and squeeze out a ¼ teaspoon, my measuring spoon overflowed with pepper as it dumped all over the fish.  I’m not talking a little dusting, I mean a lot.  I kind of panicked and then decided to either wipe it off OR run the fillet under water.  I chose to use a paper towel to wipe it off and luckily it worked!  The only downfall was that breathing in all that pepper made me sneeze quite a few times.  So if this ever happens to you, don’t worry, your dish can be salvaged.

In addition to having fish, I thought it would be nice to make a vegetable for the side dish.  My husband loves broccoli and has been wanting to add it as a side with our meals.  I on the other hand do not care for broccoli that much but decided to find a recipe that could please us both.  The recipe below is for pan roasted broccoli. From reading the directions you’ll see that it’s actually quite simple and fast.  The original recipe does not call for garlic or red pepper flakes, however after reading others reviews of additions they added, I felt we would enjoy these too.

When we began eating dinner, Ryan started with the broccoli and said that it had a nice flavor.  I didn’t have high hopes for the broccoli, but I actually really liked it.  The additional spices gave it a nice subtle kick.  I have to say I was totally geeked to try the fish recipe, so when I took my first bite of Tilapia I was a little let down.  I thought it’s good but it’s not AS good as the other salmon recipes.  I’m not quite sure how to describe what I was expecting, but it wasn’t what I had pictured.  The lavender honey sauce had a nice flavor, however I thought the sauce would be a little bit thicker.  I spooned the sauce right from the stove onto the fish, without letting it sit, which could be why it wasn’t as thick as I had imagined.  I figured Ryan would feel the same about the fish, but as we continued to eat he said he really enjoyed the fish and it had a nice nutty flavor.  I told him how the breading was made with pistachios and as he continued to eat he said “This fish is awesome.” He felt the sauce had a great flavor and was a nice touch with the fish.  Then as we were clearing the table he said that he would really like it if I made this dish again for us.  So in the end I’d say this meal was a winner.  


Pistachio-Crusted Tilapia with Lavender Honey Sauce
Adapted from Cooking Light Fresh Food Fast: Over 280 Incredibly Flavorful 5-Ingredient 15-Minute Recipesby Editors of Cooking Light Magazine (Amazon affiliate link)
Serves: 2
Prep Time: 12 mins.
Cook Time: 12 mins.

Ingredients:
  • 5 tablespoons dry bread crumbs*
*(Or if preferred: 3 tablespoons bread crumbs & 2 tablespoons Panko bread crumbs)
  • 5 tablespoons unsalted shelled dry-roasted pistachios, finely chopped
  • 2 Tilapia fillets
  • ¼ teaspoon salt
  • ¼ teaspoon black pepper
  • 2 large egg whites, lightly beaten
Directions:
  1. Preheat oven to 450˚F.
  2. In a small bowl mix bread crumbs and pistachios together.  Pour crumbs onto a large plate. 
  3. Sprinkle Tilapia fillets evenly with salt and pepper.  Dip fillets in egg whites.  Place fillets on top of bread crumb mixture.  Scoop bread crumb mixture on top of fillets and gently press into the fish.  Turn fillets over repeating scoop and pat process. 
  4. Line a jelly-roll pan or baking sheet with parchment paper.  Place fillets on pan and bake for 12 minutes or until fish flakes easily when tested with a fork.  Drizzle fillets evenly with Lavender Honey Sauce (recipe listed below). 

Lavender Honey Sauce
Adapted from Cooking Light Fresh Food Fast: Over 280 Incredibly Flavorful 5-Ingredient 15-Minute Recipesby Editors of Cooking Light Magazine (Amazon affiliate link)
Serves: 2
Prep Time: 2 mins.
Cook Time: 2 mins.

Ingredients:
  • 2 tablespoons butter
  • 2 tablespoons lavender honey
  • 1 tablespoon lemon juice
Directions:
  1. Melt butter in a small saucepan over medium heat.  Add honey and lemon juice, stirring to combine well. 

Pan Roasted Broccoli
Serves:  4
Prep Time: 10 mins.
Cook Time: 5 mins.

Ingredients:
  • 3 tablespoons water
  • 1/4 teaspoon salt
  • 1/8 teaspoon pepper
  • 2 tablespoons vegetable oil
  • 1 1/4 lbs chopped broccoli
  • 1/4 teaspoon crushed red pepper flakes
  • 1/4 teaspoon minced garlic
Directions:
  1. Stir water, salt, and pepper together in a small bowl.
  2. In a large skillet, heat oil over medium high heat. Add chopped broccoli; spread out into an even layer.
  3. Do not stir for about 2 minutes until broccoli starts to lightly brown.
  4. Mix broccoli well and let rest in an even layer for another 2 minutes.
  5. Add the water/spice mixture. Cover the pan with a lid and cook for 2 minutes.
  6. Uncover and cook until desired doneness.

Sunday, March 27

Never Bored with Salmon

Sunday has definitely become our fish night. I really like experimenting with all the different recipes I’ve found. This one in particular caught my eye as I found it in a healthier cookbook with an appetizing picture and it sounded spicy instead of the sweet fish dishes I’ve made. On the same page in the book there was a suggested recipe to pair with it. I’m not very fond of vegetables, I’d much prefer fruit, however mint sugar snap peas? That definitely peaked my interest so I decided to make them as well.

The original recipe calls for 4 (6 oz.) salmon filets. I think fish tastes better fresh which is why I altered the recipe to serve 2 people so that we wouldn’t have left overs. I can’t accurately tell you the size/ounces of filets I cooked as I am very bad at estimating this unless it’s specifically called out on the package. I did however purchase about a pound of fish and divyed it up into smaller filets (cooking 2, freezing the rest). Without being able to tell you the exact size of the filets, my advice would be to cut the filets into what you feel is a good size portion for 1 person (think what you would receive at a restaurant). You’ll see the recipe calls for chili sauce with garlic. I had chili sauce in the fridge but it didn’t include garlic so I combined it with approximately ¼ teaspoon of minced garlic. This worked perfectly. 


What I found astounding about this recipe is that it’s amazingly FAST to make. This would be a great week night dinner as there’s minimal prep work and the fish is done in less than 10 minutes! With all that extra time, I highly suggest making a side dish. If you’re looking for something new, try the mint sugar snap peas. They go well with the dish and they’re also quite easy to make. While cooking these I learned a new rule in the kitchen which I should have known but I’m not afraid to admit that I didn’t. After rinsing vegetables make sure they are fully dry before adding them to a skillet with oil. I thought I would slowly pour the peas from the strainer directly into the oiled skillet. Of course as soon as I began to add them hot sparks of oil started to shoot up. My husband happened to be talking with me in the kitchen when this happened and as the sparks started to fly he told me Stop! And something along the lines of. ..Babe you can’t mix water with oil. He suggested drying them off completely before returning them to the pan. Ta da! That worked! Lesson learned.

When dinner was served I have to say we were both pleasantly surprised by the fish. There are so many salmon dishes I’ve come to love that it’s hard to imagine finding another exceptional dish. Well this is definitely one of them. I really thought the fish would be spicy because of the recipes name, however don’t be deceived by that, this dish had more of a sweet taste. I think the glaze was sweeter because the orange marmalade tones down the chili sauce creating a really nice flavor. As for the minted sugar snap peas I really enjoyed these a lot. The peas were a beautiful green color that had a nice crunch when you bit into them. I was expecting the mint flavor to really stand out however I tasted more of the orange zest. Ryan didn’t particularly care for the orange flavor as he felt it overpowered the peas and that’s all he tasted. We’re opposites when it comes to how we’d prefer to eat vegetables. Ryan savors the true green, earthiness taste of vegetables. He even likes to eat them raw with no ranch dressing (what?!). I, on the other hand, don’t care for that hearty taste. I like to slightly disguise it by cooking vegetables with other flavors so that I’ll be able to enjoy eating them. At least this gets me to eat more vegetables. Going back to Ryan’s point though, I agree the orange flavor was strong, however I still really enjoyed the peas. When I make the peas again (which I’m definitely planning to) I am will try adding half the amount of orange zest and that should balance the flavors more equally.


Chili Garlic Glazed Salmon
Adapted from Cooking Light Fresh Food Fast: Over 280 Incredibly Flavorful 5-Ingredient 15-Minute Recipesby Editors of Cooking Light Magazine (Amazon affiliate link)
Serves 2
Prep Time: 4 mins
Total Time: 11 mins.

Ingredients:
  • 3 tablespoons chili sauce with garlic*
        *Or ¼ tsp minced garlic can be added to regular chili sauce
  • 3 tablespoons minced green onions
  • 1 ½ tablespoons orange marmalade
  • ¾ teaspoon low sodium soy sauce
  • 2 salmon filets (medium /large size for 1 person)

Directions:
  1. Preheat broiler to 400˚F
  2. Combine first 4 ingredients in a small bowl to create chili mixture. Line baking sheet with foil and lightly grease with butter where the filets will rest.
  3. Place filets on baking sheet and spoon half of the chili mixture on top (brushing across sides as well).
  4. Broil fish for 5 minutes. After 5 minutes, remove from oven and spoon remaining chili mixture on top of filets.
  5. Broil fish for 2 more minutes or until fish flakes easily when tested with a fork.

Minted Sugar Snap Peas
Adapted from Cooking Light Fresh Food Fast: Over 280 Incredibly Flavorful 5-Ingredient 15-Minute Recipesby Editors of Cooking Light Magazine (Amazon affiliate link)
Serves 2
Prep Time: 2 mins.
Total Time: 5 mins.

Ingredients:

  • 1 teaspoon Vegetable Oil
  • 2 cups Fresh Sugar Snap Peas
  • 1 tablespoon fresh mint (chopped)
  • 1 teaspoon grated orange rind
  • ¼ teaspoon salt

Directions:
  1. Rinse peas and pat dry.
  2. Heat oil in a large non stick skillet over medium–high heat.
  3. Add peas and sauté for 2 minutes or until peas are crisp-tender.
  4. Add mint, orange zest, and salt. Stir to combine well and serve.

Related Posts Plugin for WordPress, Blogger...