Sunday, August 28

Homemade Sloppy Joes (No can!)

Everyone has their own comfort food that brings back good memories.  One of mine is Sloppy Joes.  I always think of Fall when these come to mind and maybe since we’re on the verge of entering Fall that could explain why I was craving these.  Growing up my mom made Manwich sloppy joes and I thought they were great.  But within the past few years I’ve learned how to make my own homemade sloppy joes.  I heard about people making their own mixture and I thought it seemed like a lot of effort, but trust me, it’s not that much more difficult than opening a can of Manwich.  Try it for yourself and I bet you’ll like these a lot better.  


Most likely you’ll find that you already have many of the ingredients needed to make your own sloppy joes.  Right now is an especially good time since it’s barbecuing season and I think just about everyone has barbecue sauce on hand.  If you don’t, and aren’t sure of what kind to get, my recommendation is to use any flavor of Sweet Baby Ray’s sauce.  Mmm, love their sauce!  There are fresh vegetables incorporated in this recipe such as onion, celery, and red pepper.  If you feel one of your favorites is missing, add it!  The original recipe doesn’t incorporate red pepper but I think it adds a nice subtle flavor which is why I’ve added it.  


Spread chopped vegetables in skillet before adding ground beef on top

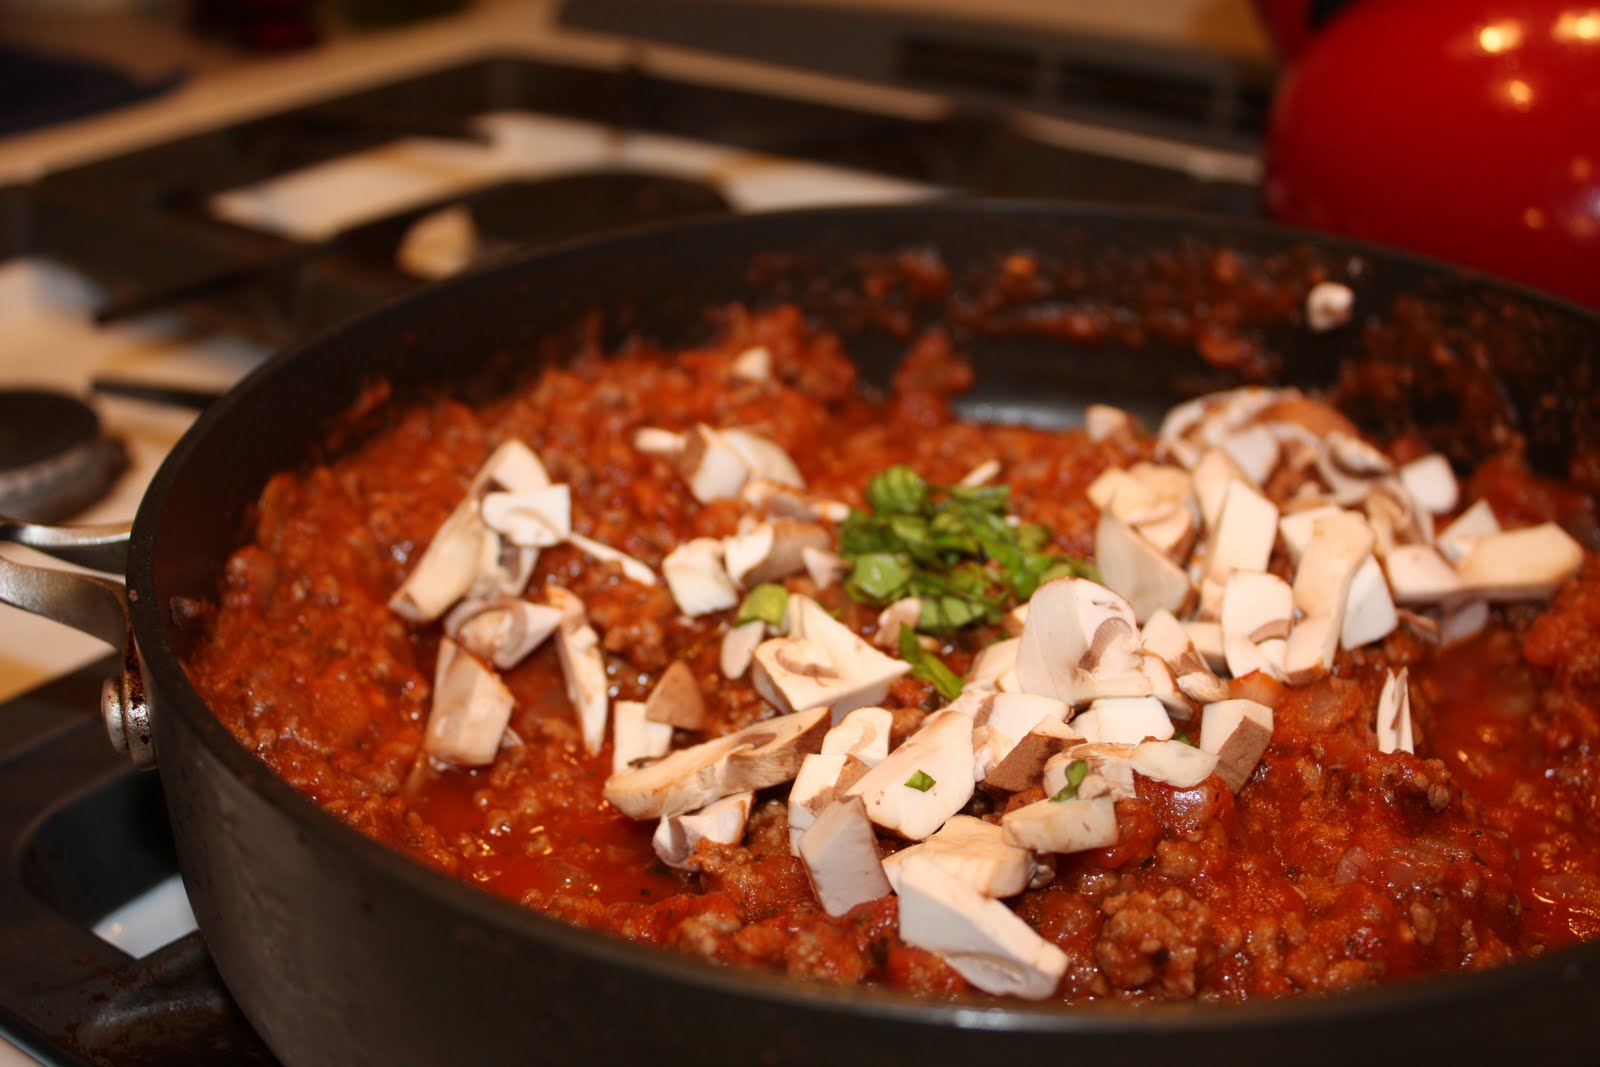
Meat mixture before sauce is created/added
One of the modifications I’ve made is to serve the sloppy joes on toasted bread.  This happened when we were out of hamburger buns and I decided bread would just have to work.  If the bread is toasted (same secret for hamburger buns), it will hold up better and not become soggy when the mixture is placed on top.   The bread can be used to create a sandwich or the meat mixture can be placed on top of one bread slice and served open faced (using a fork to eat it).   We’ve now resorted to using bread all the time.  It’s much easier as it’s something we always have on hand. 

If you follow the directions below you’ll see that sloppy joes are easy to make and can be made fairly quickly too.  One of the things I love about creating your own sloppy joes is that they have a nice slight crunch from the sautéed vegetables.  I’ve never tasted that from using a canned mixture.  Beyond that, the barbecue flavor is just as good as Manwich and other varieties, but a lot less sodium and minus the weird ingredients that you’ve never heard of.   Now that I’ve experienced the flavor of making my own, I will never go back to opening another can of Manwich! 


Homemade Sloppy Joes
Serves 4-6
Prep Time:  10 mins.
Total Time: 30 mins.

Ingredients:
  •     1 lb ground beef
  •     3 stalks celery, chopped
  •     1 medium vidalia onion, chopped
  •     1 red pepper, chopped
  •     1 (8 ounce) can tomato sauce
  •     1/4 cup ketchup
  •     1/4 cup barbecue sauce (your favorite kind)
  •     1 tablespoon firmly packed brown sugar
  •     1 teaspoon dry mustard
  •     salt and pepper
  •     shredded cheddar or colby jack cheese (optional)
  •     1 tablespoon worcestershire sauce
  •     1 tablespoon vinegar

    Directions:
    1. Add chopped onion, celery, and red pepper to a large skillet.  Place hamburger meat directly on top of the vegetables and turn heat on to medium high. 
    2. Mix & combine beef and fresh vegetables together as they cook.  When the meat is browned and thoroughly combined with the vegetables, drain the fat.
    3. After fat is drained, return beef/vegetable mixture to the skillet.  Cooking over low heat, add in the remaining ingredients.
    4. Cover and simmer for 15-20 minutes; stirring occasionally.
    5. Remove cover and let some of the moisture evaporate (approximately 3-5 minutes); stirring occasionally.
    6. Serve on toasted bread or toasted buns.  If desired, top sloppy joes with shredded cheese when served on the bread/buns.


    Sunday, August 21

    Zucchini Lasagna

    This summer we planted zucchini in our garden for the very first time.  The plant started off so small that I didn’t think it would produce anything.  But within a few weeks, the plant became so large you would have thought it was on steroids.  Pretty soon we had quite large zucchini and that’s when I began searching for recipes on my favorite cooking sites.  I’ve made roasted zucchini a few times but I wanted to try something new.  I’ve never made zucchini bread, so yes that’s in the works,  but I wanted to make something beyond the traditional bread.  That’s when I came across this recipe for zucchini lasagna.  It’s a healthy recipe that uses zucchini instead of noodles.  

    Our zucchini!

    If you prefer to make your own sauce, you can follow the original recipe by clicking on the link below.  I’ve made my own sauce before and it’s definitely worth the extra effort, however my goal this time was to make a dish that wouldn’t take forever on a week night.  That’s why I chose to modify the recipe and use jarred pasta sauce instead.  I’ve learned that you can spruce up pasta sauce from the grocery store quite easily and make it taste ‘homemade’.    To create this taste, I add onion and fresh mushrooms to develop a thick, hearty sauce.  Adding fresh basil and garlic is always a nice touch as well.  And if you really want to intensify the flavors, prepare the sauce a day ahead of time (allowing sauce to simmer for 45 minutes before refrigerating).  Think about it, doesn’t lasagna always seem to taste even better the next day?   That’s because the sauce has been sitting and the flavors have reached their true potential!

    Brown the meat & onions

    Mix fresh basil & mushrooms into the sauce
    After the sauce is made, really all that’s left is to prepare the zucchini.  Chop the ends off so it’s easier to work with and use a vegetable peeler for removing the skin on the sides.  I found it very tricky to slice the zucchini to a ¼ thick as stated in the recipe.  Actually I found this nearly impossible.  The zucchini is awkward to hold since one end is larger than the other.  There were a few times I was afraid I might cut myself.  Because of this, my slices were about ½ inch thick.  The extra thickness seemed to cook just as well, however next time I may slice the zucchini into circles vs. long noodles.  Using this technique would make working with the zucchini easier and allow for the pieces to be sliced thinner.  The pieces would then be layered on the bottom of the pan to create one full sheet.  


    The 'noodles'

    Bottom layer
    I have a FABULOUS traditional lasagna recipe that both my husband and I LOVE (to be featured in my blog this Fall).  I’m not joking when I say that he compliments me many times throughout the year how great it is and whenever he orders lasagna at a restaurant he makes sure to point out that it doesn’t even compare to mine.  So we both knew before we tasted this lasagna that it would not be the same caliber as my other recipe.  We were keeping an open mind, however, as that wouldn’t be comparing apples to apples.  This is a healthier lasagna and unique in its own way since noodles are not used.  For the type of lasagna that it is we both thought it was good.  You would think that maybe this dish wouldn’t be filling, since zucchini is used, but it’s actually quite filling.  In the end I didn’t miss having the noodles.  The zucchini was a nice substitution and a great way to use the vegetables from our garden.


    Zucchini Lasagna
    Serves : 4
    Prep Time: 20 mins.
    Total Time: 50 mins.

    Ingredients:
    • 2 large zucchini, sliced ¼ inch thick
    • 1 lb. lean ground beef
    • 2 cups onion, chopped
    • 1/2 cup fresh mushrooms, chopped
    • 1 teaspoon minced garlic
    • 1 teaspoon fresh basil
    • 1 egg          
    • 1 teaspoon flour
    • 1 jar spaghetti sauce (approximately 2 ¼ cups)
    • 3/4 cup ricotta cheese
    • 1/2 cup shredded mozzarella cheese

    Directions:
    1. Pre-heat oven to 375˚F.
    2. Chop off both ends of the zucchini.  Using a vegetable peeler, remove the skin from the sides.  Slice zucchini (lengthwise) into noodles about 1/4 inch thick. 
    3. Boil water in a large pot.   Add zucchini slices and cook for approximately 3-5 minutes, or until tender. Drain. 
    4. Fry the meat with the onions until thoroughly cooked; drain fat.
    5. In a large skillet add the meat mixture.  Next, add the pasta sauce while simmering over low heat.  Also add in the basil and garlic.
    6. In small bowl slightly beat the egg. 
    7. Add the ricotta cheese, half of the mozzarella cheese, and flour.
    8. In a 1 ½ to 2 qt. baking dish cover the bottom of the pan with half of the meat mixture. Next, top with half of the zucchini and all the ricotta cheese mixture. Lastly, top with the remaining meat and zucchini.
    9. Bake uncovered for 30 minutes.
    10. Sprinkle with remaining cheese. Bake 10 minutes longer.
    11. Let stand 10 minutes before serving.
    Note: See tip above on preparing pasta sauce a day ahead of time (optional)

    Friday, August 12

    Summer Time Turkey Club

    This seems like an odd recipe to feature on a cooking blog, however this sandwich is one of my favorites. We’ve all gone to restaurants and ordered the typical club sandwich or maybe even a fancier version with cucumbers and sprouts.  There’s no question they’re good, but you can make just as good of a sandwich at home, if not better.   


    I’m an avid lunch packer during the work week as going out to eat every day can be very expensive, not to mention unhealthy too.  If you make a sandwich like this it’s filling and just as good as a restaurant version.  One of the best tips I’ve discovered over the years is to toast your bread.  This is especially helpful if your sandwich is going to be sitting in the fridge for a few hours.  Toasting the bread helps prevent soggy sandwiches.  There’s really nothing worse than mushy bread.  If you love tomatoes on your sandwich like I do, pack them separately in a Ziploc bag.  When you’re ready to each your sandwich, then add the tomato slices.  Adding the tomato slices right before you eat ensures the bread doesn’t become saturated from the tomato juices.

    Mayo basil spread


    I’ve also discovered that sprouts are a nice alternative to lettuce.  Very seldom do we buy lettuce at our house.  I feel guilty buying a whole head of lettuce when I only need a few pieces, knowing the rest will go to waste.  Sprouts are sold in small packages and when added to a sandwich they add a nice subtle flavor as well as texture. 

    A time saving tip for this recipe is to buy packaged hard boiled eggs.  Eggland’s Best produces these and they’re stocked next to the regular eggs in most grocery stores.  I used to judge the people who bought these (who can’t boil eggs?), but then I tried them and saw the benefits first hand.  They’re packaged in a convenient, re-sealable bag with 12 in each.  They’re PERFECTLY cooked and there are absolutely NO traces of shells left behind!  If you choose to buy a package and are wondering what to do with the remaining eggs, eat them as a small snack, or add to salads, as they’re a good source of protein.  


    Follow the directions below and you’re guaranteed to put together a good sandwich.  We all have different tastes so if there’s an ingredient below that you don’t care for, substitute it for one you like.  Make this ‘your’ sandwich.


    Summer Time Turkey Club by Alissa Hebert
    Serves 2
    Prep Time: 5 mins.
    Total Time: 15 mins.

    Ingredients:
    • 4 slices multigrain bread
    • 6 slices honey roasted turkey lunch meat
    • 2 slices provolone cheese
    • 1 medium sized tomato
    • 1 small avocado
    • 1 hard boiled egg
    • 2 tablespoons mayonnaise
    • 2 teaspoons fresh basil leaves (approximately 12 leaves)
    • alfalfa sprouts
    • honey dijon mustard

    Directions:
    1. Lightly toast the bread slices.
    2. Slice hard boiled egg (lengthwise) into 4 slices.  Cut tomato into 4 slices.  Thinly slice avocado (lengthwise).
    3. Place mayo in a small bowl.  Chop basil leaves and add to mayo, mixing well.
    4. Begin making both sandwiches by spreading the mayo basil mixture onto 2 slices of bread.  Top each slice with provolone cheese.
    5. Lay sprouts over cheese.
    6. Place 2 tomato slices on top of the sprouts (2 tomato slices per bread slice).
    7. Add 3 slices of turkey to each sandwich.
    8. Add 2 slices of hard boiled egg on top of lunchmeat.  Add the avocado slices around the egg slices and over the egg slices. 
    9. Spread honey dijon mustard onto remaining bread slices.  Add each slice on top of the prepared sandwiches.  Cut sandwiches in half and serve.
    Please note the completed Summer Time Turkey Club photos above do not follow the same order as my directions above.  This is the first recipe I've written and I wrote it afterwards.  The sandwich can be put together in any order and the results will still taste good.

    Sunday, August 7

    Chicken with Mustard Pan Sauce

    There’s only a few chicken recipes featured on my blog and when I came across this one I thought it be the perfect addition.  I’ve made fish recipes with a honey mustard glaze so why not a chicken one?  And this one involves cooking with wine, gotta love that!


    I made a few modifications to the original recipe.  It called for chicken breasts with skin, but skinless chicken breasts are much healthier and I didn’t think it would change the taste of the recipe that much.  Using skinless chicken breasts also saves time when making this dish.  How so?  The breasts with skin need to be cooked in the skillet and then baked.  With skinless chicken breasts, however, I found you can get everything accomplished in one step; no need for baking as well.  I also discovered I had all the ingredients for this dish except whole-grain mustard.  Whole-grain mustard is a course mustard.  I decided that instead of buying a new jar of mustard I would use the deli style mustard we already had since it’s course and has a lot of texture. 
    Assembling this dish is pretty easy.  After the chicken breasts are fully cooked and set aside, the mustard sauce can be prepared.  Since wine is used in the sauce, if you don’t drink wine frequently or don’t want to open a bottle and drink what’s left, buy miniature wine bottles instead.  Every grocery store carries these.  They’re sold in 4 packs and are for individual servings.  Each mini bottle has about 1 to 1 ½ cups.  They’re the perfect size for cooking and I think the quality is better than the ‘cooking wine’ that’s sold in the cooking aisles.
    While I was cooking, my husband commented a few times (from another room even!) on how amazing it smelled.   When we sat down and took our first bite, we both agreed that the chicken was good.   The sauce had a nice savory flavor, but I was expecting a sweeter taste, maybe because that’s what I’m used to when I’ve had mustard sauces.  I think next time I may try using honey dijon mustard to give it that sweet flavor.  What I love about this dish is that’s perfect for a weeknight dinner since it only takes 20 minutes to make.  With all that extra time you can make a nice side dish to go with the chicken.  One side dish that pairs very nicely with this meal (that I’ve made many times) is Roasted Zucchini, Mushrooms, & Onions (recipe #309788 by Lorrie in Montreal, food.com).  Enjoy!


    Chicken with Mustard Pan Sauce
    Adapted from Food Network Kitchens Favorites Recipesby Foodnetwork Kitchens (Amazon affiliate link)
    Serves 4
    Prep time: 5 mins.
    Total time: 20 mins.

    Ingredients:
    • 4 boneless chicken breasts
    • 2 tablespoons olive oil
    • 1/2 cup white wine
    • 1 ½ cups low-sodium chicken broth
    • 1 tablespoon all-purpose flour
    • 2 tablespoons water
    • 2 tablespoons whole-grain mustard
    • 1 tablespoon unsalted butter (optional)
    • fresh thyme (optional)
    • kosher salt
    • black pepper

    Directions:
    1. Heat oil in a large skillet over medium-high heat. 
    2. Season chicken breasts all over with salt and pepper.
    3. Lay chicken breasts in the pan and cook for approximately 8-10 minutes.  To cook evenly, turn chicken over after 5 minutes of cooking.
    4. Once cooked, transfer chicken to a plate and keep warm. 
    5. Pour wine into the hot skillet.  Use a spoon to scrape any browned bits in the bottom of the pan.  Boil until almost all the wine has evaporated (approximately 3 minutes).  At this point the consistency will be syrup-like. 
    6. Add the broth and bring to a boil.  A few sprigs of fresh thyme (optional) can also be added at this point.
    7. Mix the flour and water together to make a thin paste.  Whisk the flour mixture and mustard into the broth and boil until the sauce thickens (approximately 1-2 minutes).
    8. To give the sauce a little richness (optional), add the butter.  Whisk until butter has melted and is blended into the sauce. 
    9. Season with salt and pepper to taste.
    10. Place chicken on a plate and pour sauce on top before serving.
    Related Posts Plugin for WordPress, Blogger...