Sunday, September 25

Individual Chicken Pot Pies

Ever since there’s been a chill in the air I’ve had the urge to make some of my favorite meals.  One of those being chicken pot pie.  I have a staple chicken pot pie recipe that both my husband and I love, however it produces one massive pie.  I’ve really been wanting to make individual pies, like the ones you order at a restaurant.  That’s when I stumbled across a new cooking blog, that I love, and found this recipe for individual pot pies.  The pies are topped with homemade biscuits instead of pie crusts.  One of the biscuits main ingredients happens to be greek yogurt for all you greek yogurt lovers!  Overall this recipe is much healthier than my go-to recipe and it even incorporates white wine (bonus)!!! 

Before you begin baking, WAIT, do you have ramekins?  These are the individual dishes that the pie is baked in.  If you don’t you’ll need to pick some up at the store.    I had some smaller ones (7 oz.), but they weren’t big enough for a meal.  Ideally you’re looking for a 10 oz. ramekin (a little larger is ok too).  I found mine at Meijer’s but I know Target carries them as well.  They come in a plethora of colors, so have fun picking them out.  I think it’s more fun to have a mismatched set, so these are the colors I chose.  Also, before you buy them, double check the bottom to make sure they say oven proof.  


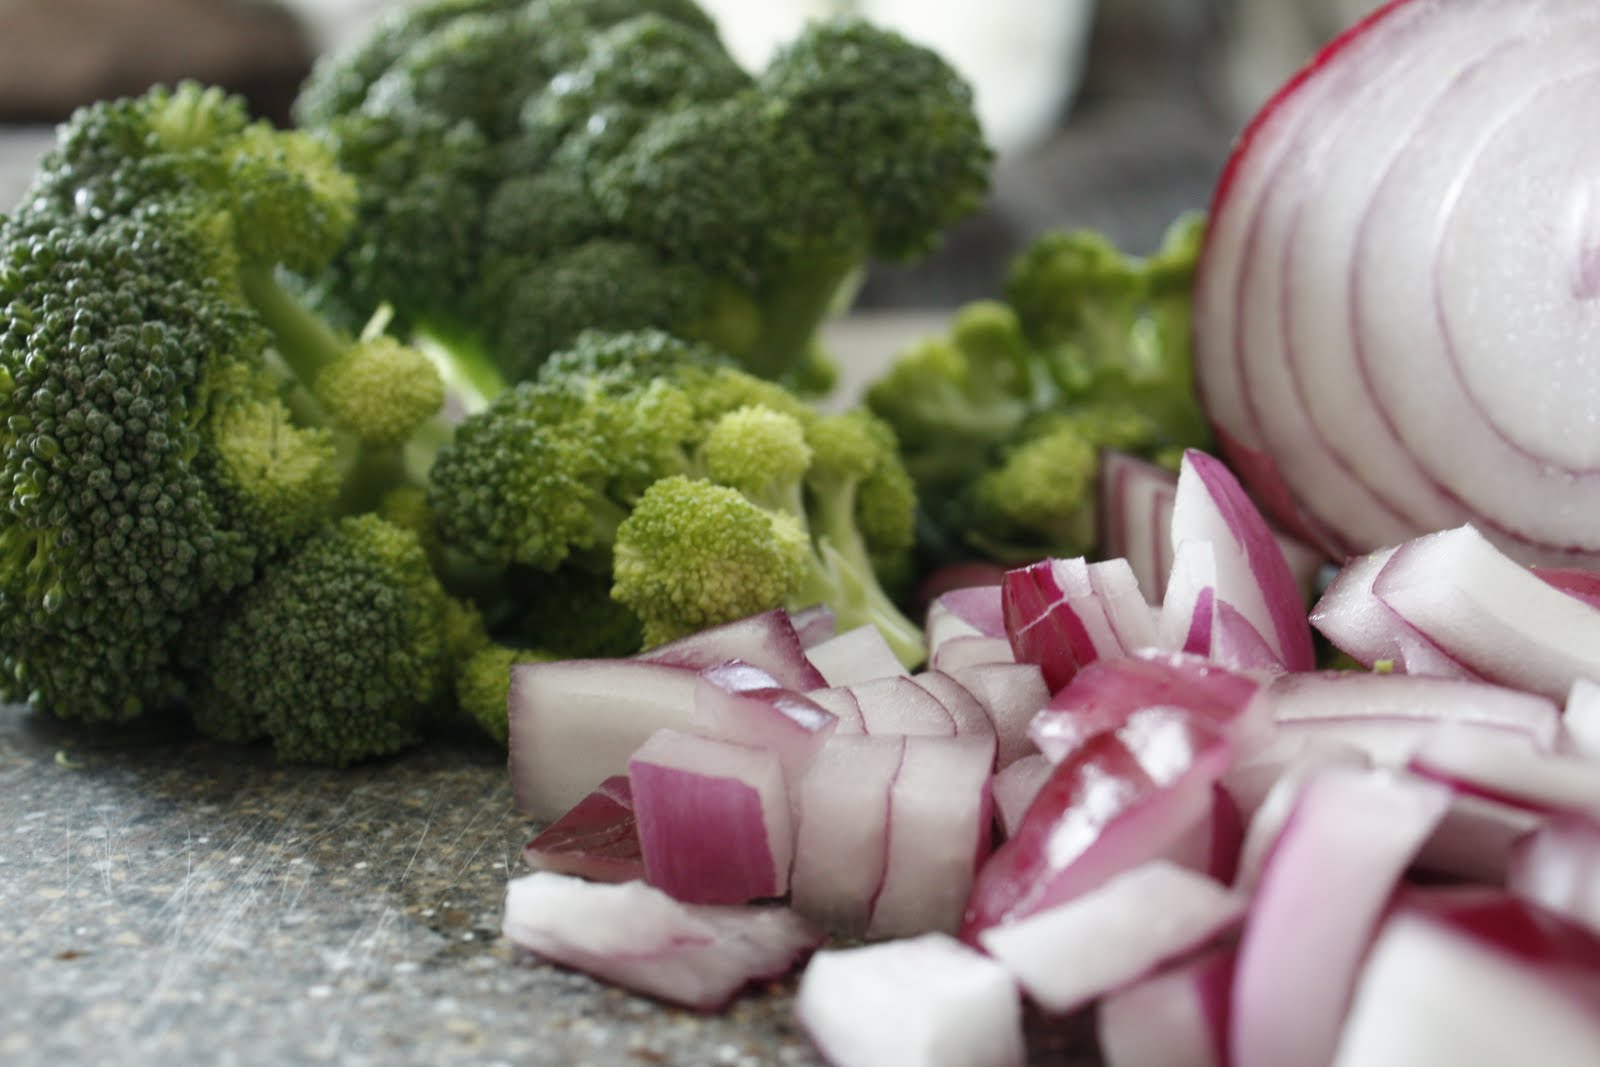
This recipe involves a lot of chopping.  If your cutting board isn’t very large, I suggest chopping one vegetable at a time and adding it to a large bowl, before moving onto the next.  This will allow you to maximize your cutting space.  Also, when cutting the green beans, an easy way to save yourself time when trimming the ends is to line about 5 or 6 green beans up in a row (all tips equally aligned), then simply chop and discard the ends.


Fast way to trim the ends off the beans

I know what you’re thinking, if I’m making the filling from scratch, can’t I just buy ready biscuit dough from the store?  It’s definitely tempting, but don’t.  It will be well worth it in the end.  Plus once the filling is simmering for 15 minutes, it’s the perfect opportunity to make the dough.

Ready to blend/process

The mixture will be crumbly

Cut the pie tops using the ramekins (flipped over)

You’ll find this recipe is very easy to produce if you follow the directions step by step.  Here’s a few tips I wanted to share that hopefully you’ll find useful.  This recipes calls for a 1/2 cup of wine.  That’s not very much wine, especially if you’re not planning to drink wine with dinner.  My suggestion: buy mini bottles of wine at the grocery store.  They usually come about 4 to a pack and they’re sold by individual serving size; just over a cup.  They’re perfect for cooking and there’s no waste after.  With this recipe you’ll have some leftover chicken stock.  You can save the remaining amount in the fridge for a few days OR if you’re a dog owner, top your dogs dry food with a drizzle of this.  Trust me it’s healthier than canned dog food and they’ll LOVE it!  I know my dog does!

Top each with biscuit dough

I have to say, when these came out of the oven, I was so excited to think that I made these!  And all from scratch!  The biscuits were a nice gold brown color and the steam rising from the ramekins smelled absolutely wonderful.  When my husband and I sunk our spoons into the pot pies for our first bite, we were pleasantly surprised.  The biscuits had a nice light buttery flavor, but not over the top buttery like you find in biscuit dough that grocery stores carry.  The chicken stock and wine created a nice soup like gravy while the vegetables were plentiful and added nice texture throughout the mixture.  My husband loved the seasonings and we both agreed we didn’t even miss having potatoes in the mixture.   This is a healthier pot pie recipe compared to the others I’ve made/tried and we were both very impressed with it.  After my husband exclaimed it was delicious, he couldn’t resist and went back for a 2nd pie.  Mission accomplished!


Individual Chicken Pot Pies
Serves:  4
Prep Time: 25 mins.
Total Time: 45 mins.

Ingredients:

Filling
  • 1 tbsp. butter
  • 3/4 lb. uncooked boneless, skinless chicken breast, cubed
  • 2 celery stalks, chopped
  • 2 large carrots, chopped
  • 1 large onion, chopped
  • 1/3 cup fresh green beans, cut into bite size pieces
  • 2 tbsp. self-rising flour (if you don’t have any you can make your own)
  • 1 cup low-sodium chicken broth
  • 1/2 cup white wine (replace with chicken broth if you prefer to not use wine)
  • 1/3 cup frozen peas
  • 1/3 cup frozen corn
  • 1 tsp. chopped fresh thyme or 1/2 tsp. dried thyme
  • 1 tsp. chopped fresh parsley (optional)
  • 1/4 tsp. black pepper
  • 1/2 tsp. salt
Topping
  • 1 cup all-purpose flour
  • 1/2 tsp. salt
  • 1 1/2 tsp. baking powder
  • 1/2 tsp. baking soda
  • 3 tbsp. cold butter, cut into small cubes
  • 1/4 cup + 3 tbsp. low-fat plain Greek yogurt
Directions:
  1. In a large pot, melt butter over medium heat. Add chicken, onion, celery, carrots and green beans. Stir frequently and cook until the chicken is no longer pink.
  2. Add flour to the chicken mixture and stir well until it has a paste like texture. 
  3. Slowly pour in chicken stock and wine, stirring constantly so no lumps form. Add peas, corn, thyme, parsley (optional), salt and pepper. Bring to a boil. Simmer for 15 minutes to allow the mixture to thicken.
  4. Preheat oven to 375˚F.
  5. While the filling is simmering, make the biscuits. Mix the flour, baking powder, baking soda and salt in a large bowl or food processor.
  6. Cut the butter into the flour mixture by hand or with a food processor. Make sure the butter is thoroughly combined. The dough mixture should be crumbly.
  7. Stir in the yogurt.  Press the dough crumbles to eventually form a ball out of the dough.
  8. Place the dough onto a lightly floured surface and knead approximately 10 times.  Add a little flour if it’s very sticky, but not too much, as it should slightly stick to your hands.
  9. Using a rolling pin, roll the dough until it is approximately 1/2 inch thick. Take one of your ramekins and use it as a biscuit cutter to create the pot pie tops.  Re-roll the dough as needed to produce more tops.
  10.  Coat the inside of each ramekin with cooking spray or lightly grease with olive oil.  Fill each ramekin, approximately ¾ full, with the chicken mixture.  Top with the biscuit dough cut outs.
  11. Cover a baking sheet with foil (the pies tend to overflow so this will help with clean up time) and place the ramekins on top.  Bake for 15-20 minutes until the biscuits are golden brown and the mixture is bubbly.
Note: Serve the ramekins on a dish to your guests as they will be too hot to hold.

    Sunday, September 18

    Raspberry Vinaigrette

    One of our favorite meals at home is a salmon salad I make with feta cheese, onions, pine nuts, and dried cherries.  I serve it with a raspberry salad dressing as they pair extremely well together.  Last week, however, after I assembled our salads and went to the fridge for the raspberry vinaigrette I realized in horror that we were short!  There was no time to go buy more and I definitely CANNOT eat salad without dressing.  Luckily my husband said I could use the last of it and he would use ranch on his salad instead.  Yuck!  But thank god he didn’t care.  This incident is what inspired me to learn how to go about making my own dressing.  Until today I never would have considered making salad dressing as I thought it would be extremely hard.   Turns out, it’s not hard AT ALL.


    I looked up a few basic tips and found that dressing typically contains 1 part vinegar to 3 parts olive oil.  This of course can be modified depending on your taste preferences.  I never would have guessed this, but honey dijon mustard is a main ingredient.  It’s used to give a nice creaminess to the dressing.  Beyond that, the seasonings and fruit (optional) are completely up to you.  I used a food processor to combine the ingredients, however if you don’t have one, don’t let this stop you.  As long as you smoosh/grind the raspberries by hand until they’re a fine liquid-like paste, you can then use a whisk to combine everything together.  When the dressing is complete, store in an air tight container in the fridge for 1-3 months.

    Ready to blend

    Since this was my first time creating salad dressing, my husband suggested I make 2 batches with different ingredients.  Then we would judge which recipe we liked better.  The recipe below is our favorite and hopefully you’ll enjoy it too.  One difference we noticed when compared to store bought dressing is that this vinaigrette is not as sweet.  But trust me, it’s still sweet enough.  We looked at the label of our normal store bought brand and saw that it contained added cane sugar.  When making your own dressing you’ll find that the raspberries alone are sweet enough, and extra sugar isn’t needed.  In the end there are 3 things I’ve come to love about making your own vinaigrette:
    1. You make the amount you want.  We don’t eat salads all the time, so 1 cup will last us for a few salads.  Say good-bye to expired salad dressing in the fridge!
    2. It’s better than store bought.  You know the ingredients that went into the making.  No chemicals and dies or artificial flavors. 
    3. You can whip it up whenever you want.


    Raspberry Vinaigrette
    Original recipe by Alissa Hebert
    Serves 4-6 (batch makes approximately 1 cup total)
    Prep Time: 5 mins.
    Total Time:  10 mins.

    Ingredients:
    • 1/2 cup extra virgin olive oil
    • 1/4 cup white balsamic raspberry blush vinegar
    • 1/2 cup fresh raspberries
    • 1/8 teaspoon salt
    • 1/4 teaspoon dried thyme leaves
    • 1/8 teaspoon pepper
    • 1 tablespoon honey
    • 2 tablespoons honey dijon mustard

    Directions:
    1. In a food processor add all of the ingredients except the olive oil.
    2. Pulse on low until all the ingredients are combined, producing a nice fine liquid.
    3. Add the olive oil in small increments, pulsing each time to combine.
    4. Use a funnel to easily pour in a jar or bottle with lid.  Chill and serve cold over salad.


    Sunday, September 11

    Minestrone Soup

    This past Labor Day weekend was very chilly and there was no question that Fall was in the air.  The weather was chilly enough to wear a hooded sweatshirt and have to restrain myself from going to a cider mill and getting warm doughnuts and cider (YUM!).  It’s still a little early in the season for the cider mill so I settled on making homemade soup instead.  I love creamy soups like Broccoli & Cheddar or Potato, Bacon, & Cheese, but I wanted something a little healthier.  One of my favorite soups is Olive Garden’s minestrone soup with fresh out of the oven breadsticks for dipping.  This recipe I found online states that it’s a ‘copycat’ of Olive Garden’s minestrone soup.  I definitely wanted to try making it!

    As you look at the recipe below you may be thinking it looks hard, but don’t sell your cooking skills short. You can easily make this!  There’s a long list of ingredients but just prepare yourself by writing a detailed grocery list.  There’s nothing worse than getting home and realizing you forgot one item.  Also, while you’re at the store, you may be tempted to buy dried basil or parsley, but don’t give in.  I used to do this as I thought fresh and dried herbs produced the same taste.  WRONG.  Not until I began getting into cooking did I understand this.  Fresh herbs have a strong, rich flavor and add a lot to a meal by enhancing the flavors.  If you want to save yourself a little bit of time, like I’ve mentioned before, buy pre-minced garlic in a jar at the store.  I even went as far as buying baby carrots since I wouldn’t have to peel them and only needed to chop them into smaller pieces.  Plus, left over carrots serve a nice purpose as they’re a healthy snack to have ready in the fridge.

    Fresh Spinach (don't buy frozen!)

    Once you’re home and ready to start cooking, most of the work centers around chopping the vegetables and herbs.  The best part is when that’s complete you can walk away, with the exception of a few stirs here and there, while the soup simmers for 40 minutes.  Let your house drink in the aroma while you decide if you want to go a step further and make homemade breadsticks.  


    My husband and I ate our soup and breadsticks while we watched one of our favorite tv shows.  At first my husband didn’t say anything and I was surprised as I thought the soup was really good.  Then out of nowhere he said, “WOW this is really good!”  The soup was a hit!  It’s very thick and hearty as it has many vegetables and pasta combined in a nice tomato infused broth.   I explained how it’s a copycat recipe of Olive Garden’s minestrone soup and he said it was better!  The most rewarding part about making this meal is that you will have many leftovers, especially if you're only cooking for 2 people.  You won’t get tired of this soup either.  The next day, while at work, my husband texted me… ‘Just had some of your soup…It was awesome.  Can’t wait for dinner.’  What’s funny is that he knew we were having leftover soup for dinner.  Make this soup, you won’t regret it!


    Minestrone Soup
    Adapted from Recipe #77585 by Suzy, food.com
    Serves 8
    Prep Time:  20 mins.
    Total Time:  1 hour

    Ingredients:

    • 3 tablespoons olive oil
    • 1 cup vidalia onion, chopped
    • 1/2 cup zucchini, chopped
    • 1/2 cup fresh green beans
    • 1/4 cup celery, chopped
    • 4 teaspoons garlic, minced (about 4 cloves)
    • 4 cups vegetable broth (note: make sure to purchase vegetable broth & not chicken broth)
    • 1 (15 ounce) can red kidney beans, drained
    • 1 (15 ounce) can great northern beans, drained
    • 1 (14 ounce) can diced tomatoes (not drained)
    • 1 (6 ounce) can tomato paste
    • 1/2 cup carrots, chopped
    • 2 tablespoons fresh parsley, minced
    • 1 1/2 teaspoons dried oregano
    • 1 1/2 teaspoons salt
    • 1/2 teaspoon ground black pepper
    • 1/2 teaspoon basil, minced
    • 1/4 teaspoon dried thyme
    • 3 cups hot water
    • 2 cups fresh spinach, chopped
    • 1 cup small shell pasta

    Directions:

    1. Chop onion, zucchini, carrots and celery.  Finely mince garlic (or use minced garlic from a jar instead).  Trim ends off the beans and discard.  Cut the beans into approximately 1 inch pieces.  Set all vegetables aside.
    2. Finely chop parsley and basil.  Roughly chop the spinach into bite size pieces.  Set aside.
    3. Heat three tablespoons of olive oil over medium heat in a large pot.
    4. Sauté onion, celery, carrots, green beans, and zucchini in the oil for 5 minutes or until the onions are translucent.  Add the garlic during the last 2 minutes.
    5. Add all of the remaining ingredients, except the spinach and pasta, to the pot.
    6. Bring soup to a boil, then reduce heat to low and simmer for 20 minutes.
    7. Add the spinach leaves and pasta shells.  Cook for an additional 20 minutes or until desired consistency.


    Sunday, September 4

    Wicked Broccoli Salad

    A few weeks ago I went to a wedding shower and had the most amazing broccoli salad.  No, not a salad with lettuce and broccoli, but more of a pasta salad that you’d find at Whole Foods, except without the pasta (if that makes any sense!).  This salad has a slight creaminess similar to traditional pasta salads, but it contains ingredients such as bacon, golden raisins and sunflower seeds that make it a really unique and fun dish to serve at a barbecue or small gathering.

    Plumping the raisins

    This dish is very easy to assemble.  Because it’s easy to assemble, DO NOT take shortcuts.   The salad includes chopped bacon and even though it would be easy and quick to buy Bacon Bits, don’t do it!  The flavor is just not the same as making your own.  It’s only a few extra minutes to cook the bacon and chop it up.  I also found that when you buy bacon from the store it’s sold by the pound.  We never cook bacon at home so I decided to freeze the remaining half pound of uncooked bacon.  Next time I make this dish, however, I plan to prepare the full pound of bacon and save the remaining amount to use throughout the week on BLT sandwiches or add the chopped bits to our salads.


    Chopped into small pieces for the salad

    This was one of the side dishes I served at our barbecue with my parents over the holiday weekend.  It tasted very similar to the salad I was trying to re-create and overall everyone enjoyed it.  The dressing is just the right consistency and the perfect amount as it doesn’t smother the broccoli.  The raisins, sunflower seeds, and bacon intensify the salad by adding a nice texture.  The dressing has a sweet flavor which my husband thought was a little too sweet for his liking, but my parents and I really enjoyed the flavor.  I have to say this salad was a major win as my dad does not eat any vegetables that are dark green in color, however he decided to try my salad after hearing my mom explain how good it was.  Not only did he like it, but he finished his serving. 


    Wicked Broccoli Salad
    Servings: 9-10
    Prep Time: 15 mins.
    Total Time: 25-30 mins.

    Ingredients:

    • 2 heads fresh broccoli
    • 1/2 cup red onion
    • 1/2 pound bacon
    • 3/4 cup golden raisins
    • 3/4 cup sunflower seeds (shells removed)
    • 1 cup mayonnaise
    • 1/2 cup white sugar
    • 2 tablespoons white wine vinegar

    Directions:

    1. Add raisins to a small bowl and cover with warm water.  Let stand 5 minutes before draining (this helps plump the raisins).
    2. Place bacon in a deep skillet and cook over medium high heat until evenly brown. Lay on paper towel to absorb grease while using another paper towel to blot the grease on top.  Cool and chop into small pieces.
    3. Chop the onion and cut broccoli into bite-size pieces. Place in a large bowl and combine with bacon, raisins, and sunflower seeds.  Mix well.
    4. In a small bowl prepare the dressing by combining the mayonnaise, sugar and vinegar.  Whisk together until smooth. Pour on top of the salad and stir until well combined.
    5. Chill in the refrigerator and serve.  For best flavor allow to chill in the fridge a few hours before serving.


    Related Posts Plugin for WordPress, Blogger...