Monday, November 28

Mini Cheese Balls

Thanksgiving is finally here!  Even before it arrived, I began fantasizing about all the different dishes we would enjoy at our family’s houses….turkey, cranberries, stuffing, yams, mashed potatoes, green bean casserole, rolls, macaroni, and PIE!  Oh my god PIEs!  Lucky for my husband and I we were fortunate enough to have 3 Thanksgivings!  How were we so lucky?  We celebrate at the grandparent’s houses on Thanksgiving Day (one for lunch, next visit for dinner) and the following day we celebrate with my family.  It’s a whirlwind of traveling but in the end the memories we have to look back upon are priceless.

Every year, though, I find myself asking the same question….What should I make?  It seems like such a simple thing, but my options are limited when all the main dishes and desserts are taken care of by the rest of the family.  I typically find something to make by browsing my favorite online recipe sites, but this year I came across a really fun appetizer in one of my cooking magazines.    Mini cheese balls!  The article pictures are what really drew me in but then I also saw how short the ingredient list was and that was the final stamp of approval. 

The recipe below is quite simple.  All the ingredients are mixed together, made into balls, refrigerated, and then rolled in your favorite topping.    Have some fun with this recipe and experiment with different cheeses and toppings.  I divided the recipe into 2 batches.  One I made using cheddar cheese while the other I made using pepper jack cheese.  I chose a variety of toppings to make an even more colorful appetizer tray.  I rolled the cheese balls in chopped pistachios, roasted sesame seeds, and chopped almonds.  

Fresh lemon zest

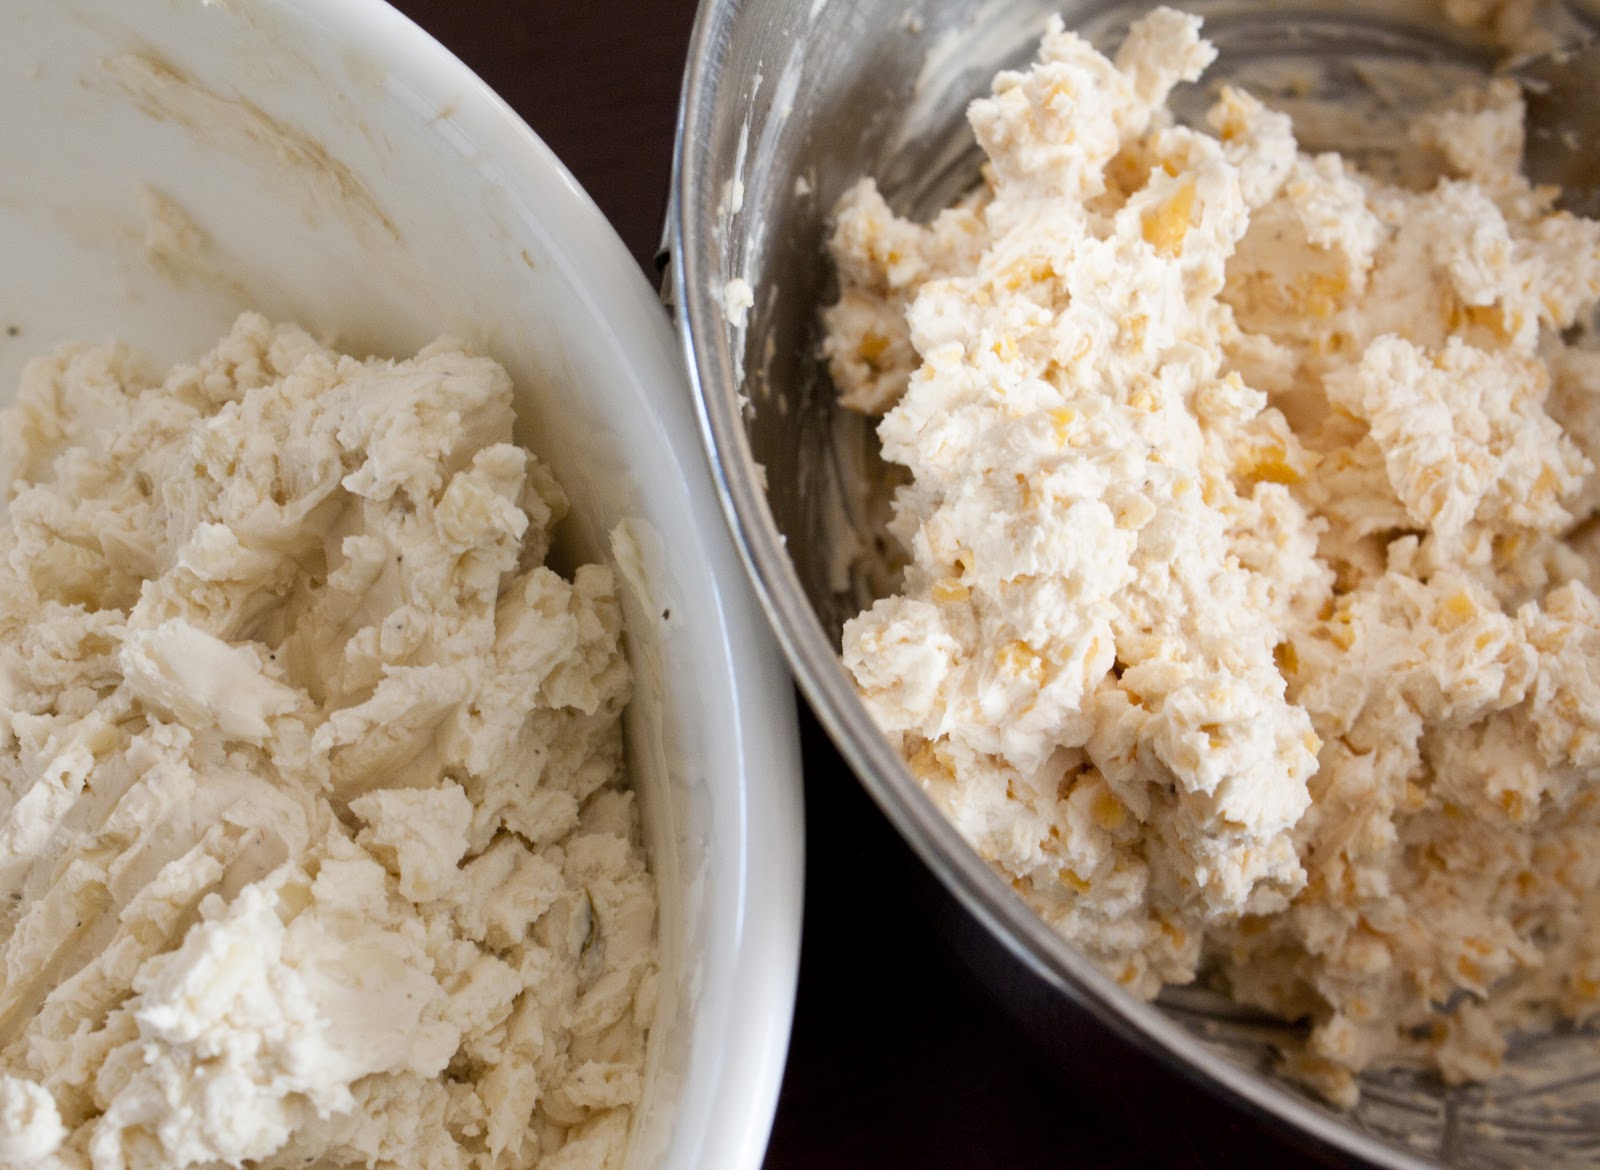
 Pepper Jack (left)  & Cheddar Cheese (right) mixtures

Chopped toppings

Roll balls in chopped toppings

I brought the cheese balls to each family’s house we visited and they were a hit.   I think what people enjoyed most about these is that they’re mini.  It’s much easier to pick up a small cheese ball and place it on your plate vs. digging into a large cheese ball.   The best part about this appetizer is that you can prepare it a day ahead of time.  And, if you’re taking them to a party, they’re so easy to transport!  And besides who wants to go to a party and burden the host with using their oven to heat up a dish?  Simply refrigerate and serve with crackers.  Enjoy!


Mini Cheese Balls
Adapted from Mini Cheese Balls featured in the Food Network Magazine (November 2011, Volume 4, Number 9)
Serves: 25 – 30
Prep Time:  10 mins.
Total Time:  4.5 hours (NOTE: refrigeration time of 4 hours included)

Ingredients:
  • 8 oz. softened cream cheese
  • 1 teaspoon Worcestershire sauce
  • 1/2 teaspoon grated lemon zest
  • 1 cup shredded cheese (like cheddar, pepper jack, parmesan or gouda)
  • salt
  • pepper

Suggested Topping/Outside Coatings:
  • chopped pistachios
  • chives
  • bacon and paprika
  • chopped almonds
  • black & white sesame seeds

Directions:
1.       Mix cream cheese, Worcestershire sauce, lemon zest, and cheese.
2.      Season with salt and pepper.  Mix until well combined.
3.      With moistened hands form into small balls (approximately 1/2 to 1 inch thick).  When all balls have been formed, refrigerate for 4 hours before adding outside coating.
4.      Roll balls in your favorite topping/coating.  Refrigerate until ready to serve. 
5.      Serve with crackers.

Sunday, November 20

Mini Egg Souffles

I’ve experimented with many new dishes for my blog, but none for breakfast.  That’s probably because breakfast is my least favorite meal.  I’ve never understood (and still don’t) why people get so excited over eggs and toast.  Throw in the typical hash browns and sausage and I still don’t get it.   I’ve eaten it many times, but have never truly enjoyed it.  Maybe it’s the ‘All American Breakfast’ that just turns me off.  Instead I swoon at pastries and bagels.  Croissants with melted chocolate in the middle?  YES PLEASE.  Crepes?  Yes I’ll have one of those.  There is one exception to not liking eggs for breakfast.  I LOVE egg soufflés.  If you haven’t tried Panera’s Spinach & Artichoke Soufflé, you haven’t lived.  This soufflé is absolutely, utterly, amazing.  Hence, why I decided to see if I could find a similar dish to make for breakfast today.  And, well, the fact that I need to find another use for my ramekins beyond chicken pot pies.


The original recipe only calls for eggs and cheese, however I’ve modified it so that you can incorporate your favorite vegetables.  I chose to add fresh mushrooms, green peppers, and onion to ours.  Because the soufflés are in the oven for a short amount of time, it’s important to cook the vegetables beforehand.  Simply add some oil to a small skillet and cook over medium heat until the vegetables are tender.  After they’ve cooked, they can then be added to the soufflé mixture.

Cooked vegetables

Ready to go in the oven

Trust me when I set out to make this dish I knew that it was not going to compete with Panera’s Spinach & Artichoke Soufflé.  Again, I highly urge you to try this breakfast at Panera’s if you haven’t already.  This soufflé, however, is the perfect alternative.  Eat it while at home in your pajamas!   Can’t beat that for a Sunday morning!   Both my husband and I really enjoyed the soufflés.  The edges and top had a nice puffy texture while the inside was incredibly moist and cheesy.  These came out exceptionally well for homemade soufflés!  Try it, you won’t be disappointed!


Mini Egg Soufflés
Serves:  2
Prep Time:  5 mins.
Total Time:  20 mins.

Ingredients:
  • 2 eggs, beaten
  • 1 tablespoon sour cream
  • 1 teaspoon milk
  • 1/2 teaspoon baking powder
  • 1/4  teaspoon Mrs. Dash Original Blend (salt -free) seasoning
  • 4 - 5 drops hot sauce
  • 1/2 cup shredded cheddar cheese
  • 1/4 cup sautéed vegetables (optional)
 Directions:
  1. Pre-heat oven to 350˚F.  Grease the bottom and sides of 2 ramekins (6 or 7 oz.).
  2. If adding vegetables sauté in a small pan, with olive oil, over medium heat.  Cook until vegetables are translucent (approximately 5 minutes).
  3. Combine all ingredients except cheese; mix well.
  4. Add cheese; stir.
  5. Divide mixture evenly between the ramekins.  Place on a foil lined baking sheet (to catch any spills/overflow) and bake for 12 to 14 minutes. Allow to cool 5 minutes before serving.

Sunday, November 13

Roasted Fingerling Potatoes

Recently I took a cooking class at the Birmingham Community House which happens to be right across the street from where I work.  How convenient!  I highly recommend checking to see if your city, or a nearby city, has a community center.  They offer all sorts of classes (exercise, cooking, foreign language, dance, etc) at very reasonable prices.  The class I took was called Quick & Easy Weeknight Meals.  The 2 hour class cost $36 and during that time we made 7 different meals and side dishes.  The best part is we were able to sample ALL of them.  YUM!!! 

This is a recipe for one my favorite sides that we tried, Roasted Potatoes.  We paired it with flank steak and these potatoes tasted divine!  This is such a simple recipe too.  The only thing you’ll find hard about assembling this dish is waiting 45 minutes while the potatoes cook in the oven.  They taste so wonderful when they come out of the oven and I am in complete agreement with our teacher who said “Why would you make French fries (implying the frozen kind) when you could make these instead? “

You can make roasted potatoes using traditional Yukon Gold, Idaho, or redskin potatoes but this recipe, including the cooking time, is specifically for Fingerling potatoes.  Until this class I had never heard of fingerling potatoes.  Fingerlings are different varieties of potatoes (French, Russian Banana, and Purple Peruvian) that grow small and narrow.  Because of their shape and size, they are perfect for roasting.  These potatoes aren’t easy to find in grocery stores though.  Our teacher told us Costco sells them, however I thought I might save myself a trip and check my normal grocery store (Meijer).  Unfortunately they didn’t carry them.  I think higher end grocery stores may carry these, but if you don’t feel like searching, Costco sells a 5 lb. bag for $6.99.  

Five pound bag of Fingerlings from Costco


The various shapes, sizes, and colors of Fingerlings
One of the most important things you’ll need to remember when making this side dish is to cut the potatoes into similar bite size pieces.  This will ensure all the potatoes cook evenly.  Otherwise you’ll have some potatoes that are mushy (over done) while others are cooked just right.  For the most part all you’ll need to do is cut the fingerlings in half.  However you’ll find that some are long and narrow while others are short and fat.  Because of this, you may need to cut a short and fat potato into quarters, while the long and skinny potatoes are halved.  This will help keep the thickness of the potatoes consistent.


When all the potatoes are sliced, you’ll need to cover them with oil and herbs.  I find that 1 tablespoon of olive oil is perfect for around 2 lbs.  You’ll want to make sure that the potatoes are evenly coated with olive oil but not swimming in it.  You may need to buy some Mrs. Dash seasoning if you don’t have any at home, but this can be found at any grocery store.  Also, you can use regular salt for these, however I find that using freshly ground sea salt really takes these up a notch.  The stores even sell sea salt  that is already packaged in a grinder.  These range from $2-4 and are sold right in the baking aisle next to all the other herbs and spices.  Below is a picture of the one I purchased at Meijer.  Once the cap is removed, the grinder works by simply twisting the top.


When the potatoes are ready to bake, use parchment paper to line a sheet pan.  Parchment paper is different from wax paper.  I previously thought they could be interchanged.  Not so much.  If you don’t have parchment paper in your house, buy a roll.  It’s super handy.  It will save your prized possessions from sticking to the pan and save YOU some scrubbing work afterwards.  When the potatoes are placed on the pan, the skin side should face down on the parchment paper while the inside of the potato faces upwards.  This will ensure the potatoes cook evenly. 

Ready to put in the oven

Enjoy!  I know you’ll love these just as much as we do.  The best part about serving these potatoes as a side is that you can pair them with a fancy dish such as steak or with something as simple as a turkey sandwich, like we did today!


Roasted Fingerling Potatoes
Adapted from Roasted Potatoes recipe by Chef Pam Gustairs (Birmingham Community Center)
Serves 4-6
Prep Time: 10 mins.
Total Time:  60-65 mins.

Ingredients:
  • 2-3 pounds Fingerling potatoes
  • 1-2 tablespoons extra virgin olive oil
  • 1-2 cloves garlic, minced (optional)
  • 1/2  teaspoon Mrs. Dash Original Blend (salt -free) seasoning
  • 1 -2 pinches regular salt OR 1-2 cracks of freshly ground sea salt

Directions:
  1. Pre-heat oven to 350˚F.
  2. Wash potatoes (peel if desired) and cut into similar bite size pieces.
  3. Place potatoes in a medium bowl and add minced garlic.  Toss.
  4. Add olive oil and toss potatoes to coat evenly. 
  5. Add Mrs. Dash seasoning and salt.  Toss to coat all potatoes.  Tip:  Sprinkle the seasoning and salt high above the bowl instead of directly on top of the potatoes.  This ensures the seasoning will ‘sprinkle’ and not ‘clump’.
  6. Line a sheet pan with parchment paper.  Dump potatoes onto the pan and arrange so that all potato skins are facing down on the parchment paper. 
  7. Bake for 45-55 minutes or until potatoes are golden brown and tender.


Sunday, November 6

Snebert's Chili

Fall is such a wonderful time for chili.  It brings back memories of being a student at Michigan State University and hardly being able to contain my excitement of returning home during holiday break and having real, home cooked meals.  I can’t remember if my mom would ask me what I wanted her to make or if I requested my favorites before I even arrived home.  Either way, chili was always one of those meals. 

My mom’s chili was always good but eventually my husband (boyfriend at the time) and I created our own.  After trying a few chili recipes we had an idea of what we liked and began to write down everything we added to the pot.  We got a little crazy as this recipe serves a lot of people.  We even managed to overflow my husbands crock-pot one time.  That’s when I became wise and bought my own LARGE crock-pot that holds this recipe perfectly. 

We started our own tradition of making chili for the Detroit Lion’s first football game of the season.  We were so excited to watch the game (well maybe Ryan was a little more than me) that it helped to keep ourselves occupied beforehand.  And when the game finally started we had warm chili to cuddle up with on the coach and eat while watching the game.  Heaven.

Trust me, we become more and more creative each year.  The recipe below is just a snapshot of how we currently make our chili.  It seems like a new ingredient is always entering our crock-pot.  One year it was brown sugar, another year it was honey, and then roasted peppers.  Each new ingredient worked quite well and we kept adding them onto our base recipe.  Have fun when putting this dish together.  This recipe suits our tastes, but what do you like that’s missing?  Don’t be afraid to add different ingredients.  It’s pretty hard to ruin chili.  A few years ago I went to a hunting lodge that was hosting a chili cook off and I have never seen so many different kinds of chili!  There was cherry chili, catfish chili (yes it was even in a camouflage hunting crock-pot!) and many more.  You name it, they had it.  So be creative.

When the chili is ready have a variety of toppings to enhance your experience.  Many people like to serve cornbread with their chili.  My husband and I like to crumble it over the top of our chili.  Add a dollop of cold sour cream to cool down your first few bites while adding a bit of creaminess.  Perhaps my favorite…French’s fried onions for some texture.  And last, but not least, some freshly shredded cheddar cheese.  

Some of our favorite toppings

If you’re wondering why the chili is called Snebert’s chili, no it’s not because you’ll find it in the Lemony Snicket’s series, it’s actually made from a combination of my maiden name and my husband’s last name (now mine as well) since we were only dating at the time.  I hope you’ll enjoy this chili as much as we do!


Snebert’s Chili
Original recipe by Alissa & Ryan Hebert
Serves: 10-12 people
Prep time: 20 mins.
Total time:  5 hours

Ingredients: 
  • 2 lbs ground beef
  • 1 (29 oz.) can tomato sauce
  • 1 (15.5 oz.) can kidney beans (with liquid)
  • 1 (15 oz.) can black beans (with liquid)
  • 1 (30.5 oz) can mild chili beans in chili sauce
  • 1 (14.5 oz) can diced tomatoes w/ green chilies
  • 1/2 of medium Vidalia onion, chopped
  • 1/2 of medium red onion, chopped
  • 2 stalks celery, chopped
  • 2 teaspoons cumin powder
  • 3 tablespoons chili powder
  • 1 ½ teaspoons black pepper
  • 2 teaspoons salt
  • 3/4 cup water
  • 1 roasted red pepper, chopped (include half of the liquid from the 12 oz. jar)
  • 3 heaping teaspoons brown sugar
  • Honey

Directions:
  1. Cook the ground beef and drain the fat.
  2. In a large crock-pot add ground beef and all of the remaining ingredients.  When adding the honey drizzle 1 to 2 drizzles over the top of the chili; stir well to combine.
  3. Turn crock-pot on to high heat and cover with lid, making sure to stir every so often.  Cook on high for approximately 4 hours, then remove lid and cook on low for 1 hour.
Related Posts Plugin for WordPress, Blogger...