Showing posts with label pizza. Show all posts

Monday, February 20

Thai Chicken Pizza

What American doesn’t love pizza?  I think it’s funny that whenever my mom visits  my husband and I, and we ask her what she wants to eat for dinner, she responds by saying let’s order pizza!  She loves pizza.  I think she could eat it every day and not get tired of it.  I love pizza too, but over the years my taste has changed.  When I was young I used to love Pizza Hut's deep dish pizza.  When my husband and I were dating we would order Papa John’s deep dish or Domino’s thin crust pizza.  And since we moved to Whitmore Lake we’ve found there aren’t many pizza chains that are nearby.   There’s a new, family owned pizza joint (Mickey’s Pizza) that has become our favorite, but many nights we decide to make our own pizza.
 
Making pizza at home is quite simple and I think you’ll prefer the taste.  Not only can you customize it to your liking (heavy sauce, light cheese, extra pepperoni, etc.) but you can use fresh ingredients as well.  You can take the easy route and buy pre-made dough (brands such as Boboli, etc) or you can make your own from scratch.  Making your own pizza dough from scratch is not hard at all.  If you’re making pizza during the week, after you get home from work, you will most likely find that you want to eat ASAP and not wait 30 minutes or more for the dough to rise.  I always find myself in this situation so instead I buy a dough mix (Martha White’s Deep Pan Pizza Crust Mix) and simply add water and oil.  Only 5 minutes!

I guarantee if you try making your own pizza, you’ll love it.  And it only takes approximately 10 minutes to bake.  That’s faster than frozen pizzas you can buy at the store!  Once you master making your own pizzas you’ll want to experiment with toppings.  That’s how the recipe below originated.  While my husband and I were in England, this past Fall, I ordered chicken Thai pizza for dinner one night.  I had never heard of such a pizza, but knew from the toppings I would love it.  This is definitely not your traditional pizza.  It’s made with a Thai peanut sauce and topped with chicken, shredded carrots, snow peas, bean sprouts, roasted peanuts and cilantro.  I was mesmerized after I took my first bite.  It was soooo good. 

I knew I wanted to make this when we returned home and the recipe below is just that.  I’ve made some modifications to the original recipe, but I also noticed that the reviewers said it tastes very similar to California Pizza Kitchen’s Thai Chicken Pizza.

If you’re like me, there’s a few ingredients below that you may not have readily available at home.  For instance, oyster sauce.  You can find oyster sauce and hoisin sauce in the Asian section at your local grocery store.  Kikkoman is a widely known brand for soy sauce and I discovered that they also make oyster sauce.  You’ll also see that fresh ginger is used in making this sauce.  If you’ve never worked with fresh ginger, don’t let it scare you.  You can find ginger root sold in the produce department.  To cook with it simply break off one of the knubs, use a spoon or vegetable peeler to remove the skin, and mince it.   I found this short video tutorial quite helpful.  Also, the smell of fresh ginger is like no other.  It’s absolutely refreshing!  And if you cut too much, make sure to put the rest down your garbage disposal so that its exhilarating aroma can take care of any lingering smells. 

Fresh ginger


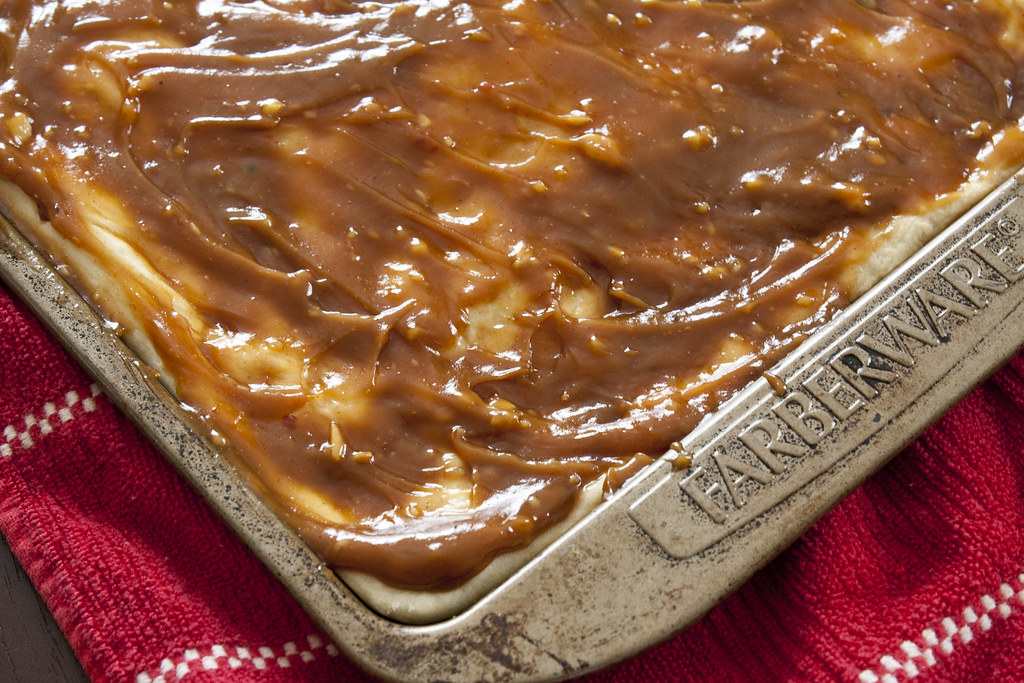
Watch out!  There's a new pizza sauce in town!

When the pizza finished baking, I could barely wait to dig in.  I took my first bite and WOW, it was amazing!  Just like the pizza I had in England!  The peanut sauce is absolutely addictive.   Not only do you have a wonderful sauce that is new to your palette, but you also have the crunch of snow peas and beans sprouts exploding like fireworks in your mouth.  This pizza was out of this world!  One of my favorite pizzas is barbeque chicken pizza, but I have to say that this is my new, all time favorite pizza.  And what I love about this pizza is that it’s so unique.  I’m already planning to make it and serve small slices as an appetizer at my next party.  Try this pizza, you will not be disappointed!
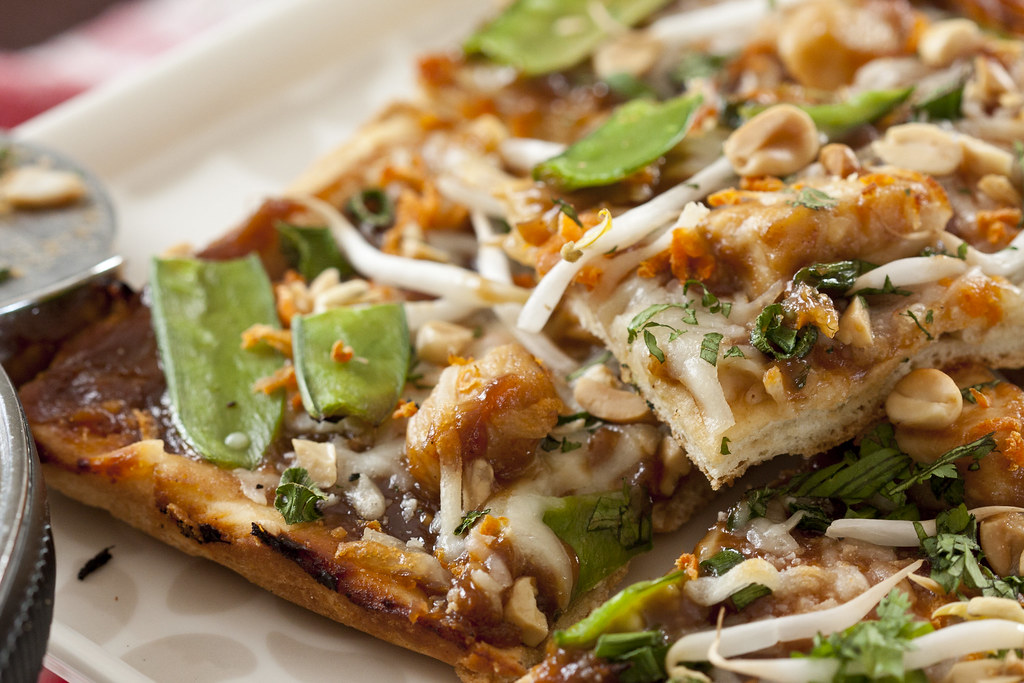


Thai Chicken Pizza
Adapted from recipe# 62778 by Kimke, food.com
Yields: 2 medium pizzas
Prep time: 25 mins.
Total Time: 40 mins


Ingredients: 

Thai Peanut Sauce
  • 1/2 cup peanut butter
  • 1/2 cup hoisin sauce
  • 1 tablespoon honey
  • 2 teaspoons red wine vinegar
  • 2 teaspoons minced ginger
  • 1 teaspoon minced garlic
  • 2 tablespoons sesame oil
  • 2 teaspoons soy sauce
  • 1 teaspoon chili sauce
  • 1 tablespoon oyster sauce
  • 2 tablespoons water

Thai Chicken
  • 1/2 tablespoon sesame oil
  • 1 boneless, skinless chicken breast (approximately 10-10.5 oz.), cut into 1/2 inch cubes  

Pizza Toppings
  • 2 pizza dough, buy pre-made or a package mix (such as Martha Whites Deep Pan Pizza Crust Mix)
  • 2 cups shredded mozzarella cheese
  • 4 scallions, sliced diagonally
  • 1/2 cup white bean sprouts
  • 1/2 cup shredded carrots
  • 1/2 cup snow peas
  • 4 tablespoons roasted peanuts, chopped
  • 2 tablespoons fresh cilantro, chopped 

Directions:
  1. If using dough mix (vs. pre-made pizza crust), follow instructions on the package to assemble dough.  Cover and set aside in a warm place such as the microwave. 
  2. In a small pan over medium heat combine all sauce ingredients.  Stir and bring to a boil.  Reduce to low heat and simmer for 2 minutes.  Set sauce aside.
  3. Trim ends off snow peas and cut pods in half.  In a small pot or skillet, add 1 tablespoon water and steam the snow peas over medium heat.  Remove when peas are crisp/tender and water has evaporated (approximately 2-3 minutes).
  4. Pre-heat oven to 450˚F.
  5. In a small skillet heat 1/2 tablespoon sesame oil over medium heat.  Add chicken pieces and cook until no longer pink inside (approximately 5-6 minutes total). 
  6. Remove chicken and place in a medium bowl.  Add 1/4 cup sauce; stir until all pieces are evenly coated.  Set aside.
  7. Lightly drizzle olive oil over 2 small to medium sized baking sheets (round or rectangular); use a cooking brush to spread evenly. Press and shape dough into each pan.
  8.  Bake dough for 3 to 4 minutes; just long enough for the dough to slightly harden (this will ensure no soggy pizza!). Remove and begin to assemble the pizzas.
  9. With the remaining sauce, divide between each pizza; spread evenly over the dough with the back of a spoon.   
  10. Top each with pizza with 3/4 cup cheese.  Add and evenly distribute the chicken pieces, green onions, shredded carrots, and snow peas.
  11. Sprinkle the remaining cheese (1/2 cup) over each pizza and their toppings.  Sprinkle the chopped peanuts, evenly, over the pizzas. 
  12. Bake for 9-11 minutes or until the cheese begins to bubble. 
  13. Remove from the oven and top with bean sprouts and cilantro.
  14. Slice and serve!

Tuesday, October 4

Stromboli

I love making homemade pizza, but this week I thought I’d try something a little different…homemade calzones!  Calzones are pizza dough that is folded over and stuffed with cheese and your favorite pizza ingredients.  If you’ve never tasted one, then you need to try one pronto!

I thought I was making calzones, however there’s one distinct difference between calzones and Stromboli that I never knew about until today.  Calzones are served with sauce on the side whereas Stromboli has the sauce baked inside.  I set out to make ‘calzones’ but in actuality made Stromboli.

For this recipe I wanted to experiment with making my own dough and marinara sauce.  If you take the long route and make everything from scratch, like I did, this will take an hour and a half to complete.  Given that the Stromboli bakes for 35 minutes I didn’t find this to be too time consuming.  If you feel this is more time than you’d like to spend in the kitchen, make it easier on yourself and buy store bought dough and marinara sauce.  By choosing this route, the recipe will only take 30 minutes from start to finish!


Cover dough & let rise

What I learned when making this recipe is that the dough will be sticky.  Don’t worry as this is normal.  Just make sure your work surface is floured, as well as your hands.  Also, be sure to use parchment paper (different than wax paper).  It’s a wonderful way to line your baking sheets and easily remove food that would normally stick.   This works great with the Stromboli, by not only keeping your pans clean but also helping to easily transfer them.  I discovered that laying the parchment paper on my counter, assembling the Stromboli on top, and then transferring it to a baking sheet worked best.  Don’t try picking up the uncooked Stromboli and moving it.  It’s very hard to do as the filling weighs the Stromboli down and the dough will become misshapen upon transferring.   I found this out the hard way after I could barely move my first Stromboli to the baking sheet.  I was finally able to move it, however my perfect shape became distorted.  I used parchment paper for the rest of my Stromboli and transferring them was a cinch!

Choose your favorite ingredients for the filling
The dough does not need to be a perfect circle.  This is how mine looked.  Good enough!
Brush with egg wash & make slits to vent

The Stromboli came out great!  I chose to add ricotta cheese to the inside mixture which gave it a rich creaminess.  I highly recommend adding ricotta to yours.  The homemade marinara sauce was addicting.  We liked it so much that even though the sauce was in the filling, we ate the Stromboli with a side of sauce for dipping as well.   Each individual Stromboli was quite large and I found that one half was filling for me.  Ryan loved them as well.  We found these to be a nice lunch option on the weekend while we watched the football games.   Enjoy! 


Stromboli
Adapted from Calzone recipe by D. Adams, allrecipes.com 
& The Best of Vegan Cooking,by Priscilla Feral (Amazon Affiliate link)

Serves: 4-6 people
Prep Time: 
  • 60 minutes (IF making dough & marinara sauce from scratch)
  • 10 minutes (IF using store bought dough & marinara sauce)
Total Time:
  • 95 minutes (IF making dough & marinara sauce from scratch)
  • 30 minutes (IF using store bought dough & marinara sauce)


Ingredients:

Dough
  • 1 1/4 cups water
  • 1 teaspoon salt
  • 3 cups bread flour
  • 1 teaspoon dry milk powder
  • 1 1/2 tablespoons white sugar
  • 2 teaspoons active dry yeast

Filling
  • Your favorite pizza toppings such as pepperoni, mushrooms, etc.
  • Shredded Mozzarella cheese
  • Ricotta cheese (optional)

Marinara Sauce
  • 2 tablespoons extra virgin olive oil
  • 2 cloves of garlic (minced)
  • 4 tablespoons fresh basil (chopped)
  • 1 teaspoon salt
  • 1 teaspoon black pepper
  • 1/2 teaspoon oregano
  • 2 cups crushed canned tomatoes


Directions:

  1. In a large mixing bowl or KitchenAid Mixer add water and sprinkle yeast on top.  Let stand 5 minutes or until yeast is slightly foamy.  Then add salt, dry milk, sugar, and bread flour.  Mix until a ball of dough begins to form.
  2. Cover bowl and place in a warm spot (such as a microwave).  Allow dough to rise for 30 minutes.
  3. While dough is rising, make the marinara sauce.  Add the olive oil to a large pot and heat over medium heat.
  4. Add garlic next cooking for 1-2 minutes (allowing garlic to slightly brown, but not burn).  Then add the crushed tomatoes and herbs.  
  5. Simmer marinara sauce until ready to use.
  6. Pre-heat oven to 350˚F.  Line a baking sheet with parchment paper.
  7. After dough has risen, knead and break apart into 4 even portions.  Roll each portion out one at a time on a floured surface.  Roll/shape into a medium to large size circle.  The circles do not need to be perfect shapes.
  8. Transfer dough circle to the parchment lined baking sheet.  Spoon marinara sauce on one half of the circle leaving a ½ inch space from the edge of the circle. 
  9. Sprinkle mozzarella cheese on top of marinara sauce.  If you opt to also add ricotta cheese, place 2 or 3 dollops on top of the mozzarella cheese before adding pizza toppings.  Now top with your favorite pizza toppings.
  10. When the filling is complete lightly sprinkle with mozzarella cheese before pulling/folding the other half of the circle over the completed side.  You should now have a half moon shape.  Lightly pinch the ends to seal.  Take a fork and use the tines to press down on the sealed edges.
  11. Create an egg wash by combining 1 egg plus 1 teaspoon of water.  Lightly brush over the whole stromboli and edges. 
  12.  Repeat process to make all 4 strombolis.  When all have been assembled, use a sharp knife to make 2 to 3 slits on top as this will allow steam to escape while cooking.
  13. Bake for 35 minutes or until golden brown (cooking times will vary depending upon the size of the stromboli).  If desired, top with parmesan cheese before serving.

Sunday, March 13

Not Your Traditional Pizza

While browsing through the library cookbooks, I found one featuring meals that are 500 calories or less. I’m not very health conscious when deciding what to make for dinner however I thought this book could teach me how to make a few healthier meals. Sharing a meal with my husband that’s only 500 calories sounds very healthy to me! There were many recipes to choose from but in the end I chose Black Bean and Corn Pizza. I know… not your typical pizza but the pictures looked very appetizing. I’ve made Mexican pizzas before with refried beans, so why not give this one a try?  Also, one of my all time favorite pizzas is bbq chicken pizza (topped with cilantro) and this recipe includes barbeque sauce. Yum!

One of the ingredients for this recipe is whole wheat pizza dough. I made the pizza dough a week in advance and froze it so that I could have it ready when I made this meal. This is definitely a time saver if you don’t feel like making everything all in one setting. You can reference my previous post, Homemade Pizza & Pizza Dough, for instructions on how to make the dough.

Overall this recipe is super easy once you have the dough ready to go. It’s just a matter of mixing and adding the toppings to the pizza. If you’ve never made homemade pizza before, you’ll see this makes a large size pizza. I used a 14.5 x 10 in. rectangular pan to bake the pizza.  When choosing your pan keep in mind the dough will fit up to this size pan with some work. By work, I mean that you’ll need to stretch and mold the dough to fit the size/shape of your pan (circulare pans will work too). At first you may think there’s no way it’ll fill the pan, but it can be done. Just be patient and keep stretching the dough. What I do is place the dough into the pan and press down with the palm of my hand, slowly inching the dough further and further to fit the pan.

Don't give up, keep stretching, it'll fill the whole pan.


This pizza cooked to perfection and looked just like the appetizing pictures in the cookbook. I liked the pizza and thought it was a good option to have as an alternative to our regular pizza/pizza toppings. It was filling as well.  This was my first time making wheat dough and it came out really nice.  My husband gave me kudos for how good the pizza looked when it came out of the oven and was excited to try it. However as we were eating, he said “It’s good but it’s not pizza.” We both laughed. So, my advice is this, if you’re craving a traditional pizza, use the whole wheat dough and stick with your favorite toppings. If you do this, you can’t go wrong. If you’re open to a healthier, non-traditional pizza then you should try this pizza.


Black Bean & Corn Pizza
Adapted from EatingWell 500-Calorie Dinners Cookbookby Jessie Price and Nicci Micco (Amazon affiliate link)
Serving size: 1 large pizza
Prep Time: 10 mins
Total Time: 15 minutes

Ingredients:
  • 1 cup canned black beans, rinsed
  • 1 cup corn kernels (fresh or frozen kernels that have been de-thawed)
  • 1 plum tomato, diced
  • 2 tablespoons cornmeal
  • 1 pound prepared whole wheat pizza dough (see previous post)
  • 1/2 cup barbeque sauce
  • 1 1/4 cups shredded mozzarella cheese 
Note: The original recipe calls for less cheese and bbq sauce.  This would add more calories if you're counting your calories.

Directions:
  1. Preheat oven to 450°F.
  2. Combine beans and corn in medium bowl. Lightly sprinkle cornmeal onto pizza stone or baking sheet. Stretch and mold dough to fit large baking stone/sheet (approximately 14.5 x 10 in. rectangular pan or circular pan can be used as well). Dough will be thinner, if it breaks, mold back together.
  3. When dough covers baking stone/sheet, bake in oven for 3-4 minutes until top of dough has slightly hardened and there’s a hint of golden color. Pre-cooking the dough prevents the pizza from getting soggy when cooked with toppings.
  4. Remove pre-cooked dough from oven and spread barbeque sauce on top with a spoon.
  5. Distribute bean mixture evenly on top of the dough. Sprinkle diced tomatoes on top. Top with cheese.
  6. Return to oven. Bake for 10-12 minutes or until cheese has a slight golden color.

Sunday, March 6

Homemade Pizza & Pizza Dough

I love making homemade pizza. At one time I used to buy the powdered dough mix from the store. It was quite simple to make by just adding hot water and some oil. Those mixes served us well for quite a while until we bought a Dutch oven for baking bread. In the past I had never used yeast, but now that I was experimenting with baking bread, why not pizza dough? So I began.

The first time I made pizza dough I found a recipe online and it turned out good except it was super thick. We typically make our pizzas with a thinner crust. The dough would have worked perfectly if I had divided it into 2 pizzas instead of 1. Lesson learned. Now I study the reviews closely to see if people say it tends to be thick or thin. My 2nd attempt at pizza dough came out great. Both my husband and I really liked it and it was the perfect thickness for us, but now began my search for a wheat pizza dough recipe as it’s needed in one of my upcoming recipes next week.

I found this recipe online and chose to make it based on the great reviews it received. Some said this was the best pizza dough they’ve had. In my books that means it’s a must try. Glancing at the ingredients I saw honey was included. You know how I feel about honey. That could only mean it’s gotta be good.

If you haven’t worked with yeast before, don’t let it frighten you. I used to read recipes and be scared away by the term ‘proofing’ yeast. Proofing sounds scientific and a little too complex for my tastes. Before using the yeast you’d need to make sure it was frothy or bubbly. How would I recognize this? But then I read a short snippet from a book one day that made everything seem much easier than the cookbooks declared. The reason why recipes call for proofing is to make sure the yeast is alive or active, because what could be worse than making a fresh batch of dough only to find it doesn’t rise after all that hard work? What the book authors reminded bakers is that when you buy yeast at the store (whether in packets or a jar), there’s always an expiration date that’s clearly marked. So if the yeast you have is not expired, you really don’t need to proof it as 99.9% of the time it’s alive. That put my mind at ease. So if you’d like to proof the yeast for peace of mind then go ahead, but if you don’t chances are your bread or dough will rise. There’s one thing that I think you’ll enjoy about proofing, when the yeast is combined with the water it smells really delicious. Maybe it smells so good because you know you’ll have pizza or bread shortly.

Proofed Yeast

Also, if you have a KitchenAid mixer, you really should try making bread or dough with it as it handles some tough mixing and kneading with ease. I used mine to make this dough. Remember, when making, you’ll need to use the mixing attachment that looks like a hook. Another reason why I like using the mixer is that the mixing bowl doubles as a nice large bowl that the dough can rise in.


There’s one thing I’d suggest in making this recipe and that’s to double it. You can one make pizza now and freeze the remaining dough for later. To freeze the dough form into a ball and place inside of a regular zip lock bag. Just remember to remove it from the freezer the night before you’ll need to use it (allowing enough time to de-thaw). I made this recipe over the weekend (doubled and froze) so that we could try a new pizza recipe later in the week. If you decide to freeze multiple batches for use at a later time just make sure each has their own bag.

I have not tried this recipe yet as I’m going to use it in a new recipe, Black Bean & Corn Pizza, that I’ll be trying next week and posting about. I’ll be sure to share if we liked it at that time. I think it’s going to be great though as my husband who was in the basement came upstairs and asked what smelled so good. At that point I had only made the dough and he thought he smelled pizza. So I think that’s a good sign!

Voila!  Ready to be made into pizza:


Whole Wheat Pizza Dough
Serves: Dough for 1 large pizza
Prep Time: 30 mins
Total Time: 45 mins

Ingredients:
  • 1 (1/4 ounce) package fast rising yeast
  • 1 cup warm water (not hot, luke warm, as hot water can kill the yeast)
  • 1 cup whole wheat flour
  • 1 1/2 cups all-purpose flour
  • 2 teaspoons olive oil
  • 1 teaspoon sugar
  • 1 teaspoon honey
  • 1 teaspoon salt
  • 1/2 teaspoon garlic powder
  • 1/2 teaspoon oregano
  • 1/2 teaspoon thyme

Directions:
  1. Combine the yeast and the water, stir until dissolved. Let sit for 5 minutes.
  2. Add the remaining ingredients to a bowl. Note: If doubling the recipe make sure this is a large bowl.
  3. Add the yeast mixture into the bowl with the remaining ingredients. Using dough hook, mix until well combined.
  4. Remove dough from mixer, sprinkle countertop with small amount of flour (will reduce sticking), knead on countertop until it forms a nice ball.
  5. Let rest in large bowl for at least a 1/2 hour. Note: If freezing, the dough can now be packaged to freeze.
  6. When ready to make the pizza, fit dough into the shape of a large pan (rectangular or circular). I use a 14.5 x 10 in. rectangular pan.
  7. Bake pizza at 450°F for 12 minutes or until cheese starts to turn a slight golden brown color.
Related Posts Plugin for WordPress, Blogger...