Monday, December 26

Mini Boston Cream Pies

It’s that time of year again when my husband and I travel all across Michigan to visit family for Christmas.  With so many holiday gatherings I start to panic a few days beforehand about what to make.  We’re never asked to bring a dish, but since I love to cook I want to make something.  The question is what? 

I have many tried and true recipes that we love but I hate bringing the same thing twice.   I love the challenge of making something new and different.  But what to make?  What to make?  That’s when I visit my favorite recipe sites (food.com or allrecipes.com) and begin searching the most popular dishes by category or entering keywords.  This time I happened to use the word ‘mini’ and was lucky enough to stumble upon this fabulous recipe!  The name says it all…MINI BOSTON CREAM PIES.  I don’t know when I tasted my first Boston Cream Pie or where, but there’s one thing I know….I LOVED it!

Let’s face it, Boston Cream Pie is dangerous.  Whether you favor the chocolate topping or the creamy middle, they’re over the top delicious and addicting.  That’s why this recipe is so great.  These are bite size mini pies.  They’re small indeed but they pack a big punch of flavor.

In all honesty I didn’t know if the original recipe meant ‘mini’ as in regular size cupcakes or mini cupcakes.  I decided to bake both and see which I preferred.  Both sizes work, however I prefer the mini cupcake size as they’re the perfect finger food.  Who wants to hold a plate when you can just pick one of these little babies up?  I also found it much easier to frost the mini cupcakes.

Regular size vs. Mini size


I have one piece of advice regarding this dessert.  If you typically like to cook by combining all the ingredients and leave the oven to take care of the rest, then this dish is not for you.  This recipe is heavily focused on prep and assembly work.   The prep work involves cutting all the cupcakes in half (there’s a lot), creating the cream filling, filling the cupcakes, preparing the chocolate icing and topping the cupcakes.  Yes, it may seem like a lot of work, but in the end these are soooo worth it.  My recommendation is to make the cupcakes the day before as this will help save time. 

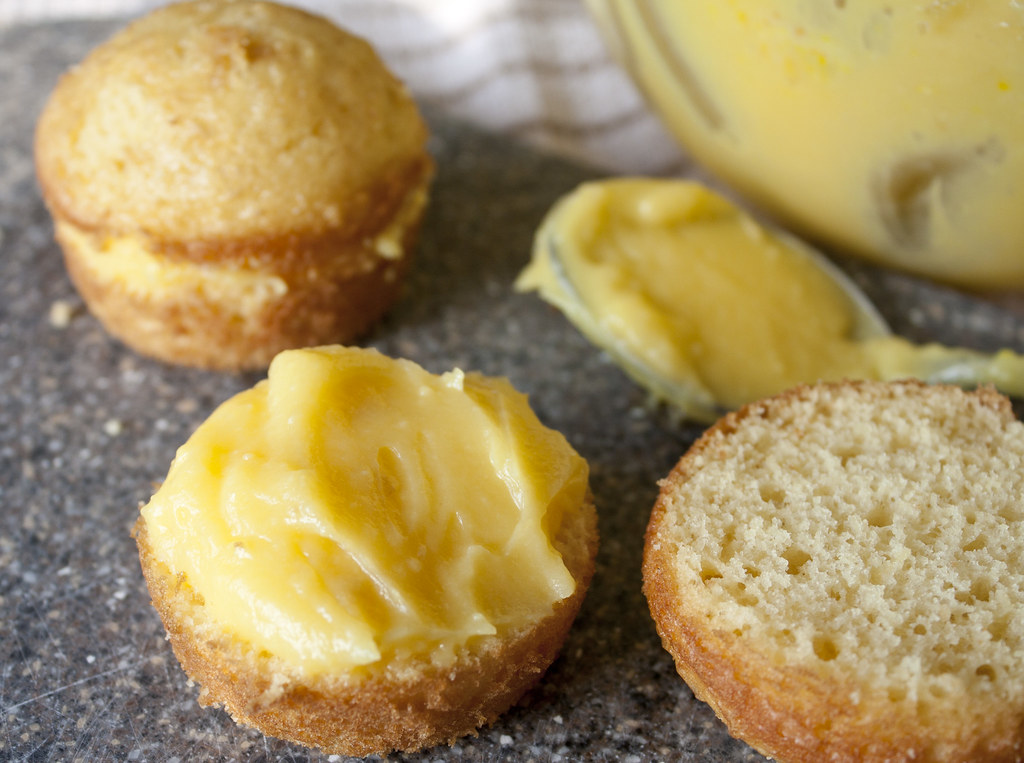
Slice cupcakes in half

Fill with Vanilla cream

Top with frosting

These mini pies are absolutely stunning once they’re assembled.  The chocolate frosting is a dark color with such a rich flavor.  I never would have thought to combine chocolate and Cool Whip to make frosting, but WOW it’s great.  So smooth. These were a huge hit at the holiday party I brought them to.    It was fun to watch people taste them and ‘sell’ them to other guests.  Pretty soon word had spread like wildfire and within a very short period of time they were all gone.  Mission accomplished!  Try this dessert, you won’t be disappointed.


Mini Boston Cream Pies
Adapted from Boston Cream Pie Minis by JELL-O, allrecipes.com
Servings: approximately 48 mini pies
Prep Time:  1 hour
Total Time:  1 hour 30 mins.

Ingredients:
  • 1 package yellow cake mix
  • 1 cup cold milk
  • 1 pkg. (3.4 oz.) JELL-O Vanilla Instant Pudding
  • 1 1/2 cups Cool Whip Topping, thawed
  • 4 squares Baker’s semi-sweet chocolate

Directions:

  1. Preheat oven to 350˚F. Prepare cake batter as directed on package and bake in greased mini muffin tins. Cool in pan completely.
  2. Combine milk and pudding mix with whisk for 2 minutes or until well blended. Let stand 5 minutes.  Gently add 1/2 cup of the whipped topping into pudding mixture; stir.
  3. Use a serrated knife to cut cupcakes horizontally in half.  Generously spoon pudding mixture onto the bottom halves of cupcakes.  Cover with top of cupcakes.
  4. Microwave (or use a double boiler) remaining chocolate in a medium size microwaveable bowl on high for 1 1/2 minutes or until chocolate is almost melted; stir until chocolate is completely melted.  If chocolate is not fully melted, continue to heat in microwave for 30 second intervals, stirring after each time.  Add remaining whipped topping. Stir to combine well.
  5. Use a spoon to spread the chocolate icing on top of the cupcakes.  Icing does not need to completely cover the tops; cover approximately 75%.
  6. Refrigerate at least 15 minutes before serving.   Note:  leftovers should be stored in the refrigerator.

Wednesday, December 21

Sweet & Spicy Nuts

I have to admit it’s hard finding time on the weekends to experiment with new recipes when Christmas is right around the corner.   As of this past weekend, I am proud to say that I finally finished ALL of my shopping.  This left me time to make one of my favorite recipes that can also double as Christmas gifts!  I’m sure, just like my husband and I, you’ve received traditional gifts of cookies or peppermint bark.  I love these (and please keep them coming our way!), but why not make something different for the holidays?  The recipe below is for sweet and spicy nuts.  Have you ever been to an event and you smell the wonderful aroma of cinnamon and sugar in the air?  There’s a vendor selling warm cinnamon and sugar nuts, but where?!  The smell is deliciously intoxicating and it’s a mad dash to find where their booth is located.  These nuts remind me of those because I find them absolutely addicting.  They have a sweet flavor but also a little bit of spice too.  The perfect combination.

Although this recipe is easy and comes together quickly, there’s a few tips I’d like to share that will help you along the way.  First, you may find it difficult to find chipotle powder.  Don’t give up, it’s out there.  At my local grocery store (Meijer’s) I could not find this spice near the usual McCormick or Meijer brand spices.  That’s when I noticed they carried some higher end spices, or perhaps just more of a variety, in a separate section right near the others.  This is where I ended up finding it.  

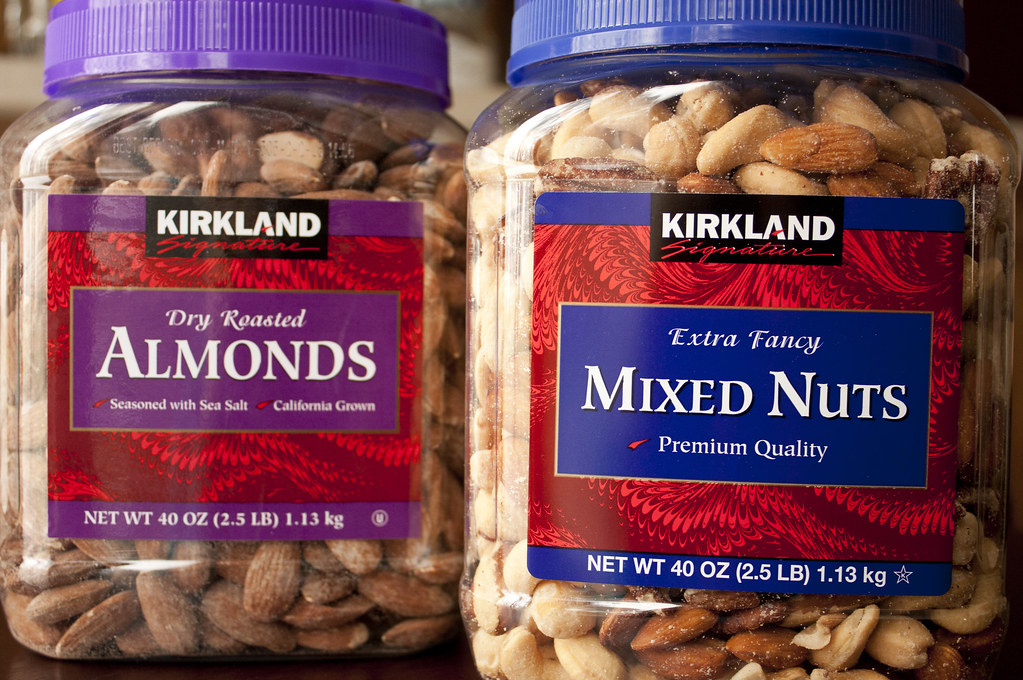
I find Costco has some of the best deals on nuts
 

My second tip:  Make sure that your baking pans are lined with parchment paper.  The original recipe places the nuts right in the pan.  I did this but after scrubbing my pans and contemplating on whether or not to throw them out, I now safely line them with parchment paper.  DO NOT SKIP THIS STEP.   You will save yourself hours (okay maybe not that long but it sure felt like it) of scrubbing.


Ready to bake in the oven


My third tip:  Instead of buying fancy containers at the store for packaging the nuts, be more eco-friendly and reuse containers that you already have.  Many times I find myself cleaning out glass salsa or jelly jars and saving them instead of adding them to our recycling bin.  They’re the perfect size for individual gifts, and personally, I think they’re so much more unique than a store bought container.  For instance look at this Michigan Honey jar!  To dress up the containers even more simply tie a bow or ribbon around them.


What’s great about this recipe is that it makes a good amount (6 cups).  Beyond individual gifts these also make great party snacks. Whatever way you like to eat them I hope you enjoy!


Sweet & Spicy Nuts
Adapted from Recipe #249723 by Feej, food.com
Serving: 6 cups
Prep Time: 15 mins.
Total Time: 35 mins.
  
Ingredients:
  • 2 teaspoons dried chipotle powder
  • 2 teaspoons salt
  • 1/2 teaspoon black pepper
  • 1/2 teaspoon cayenne pepper
  • 3/4 cup sugar
  • 1/4 cup honey
  • 1 egg white
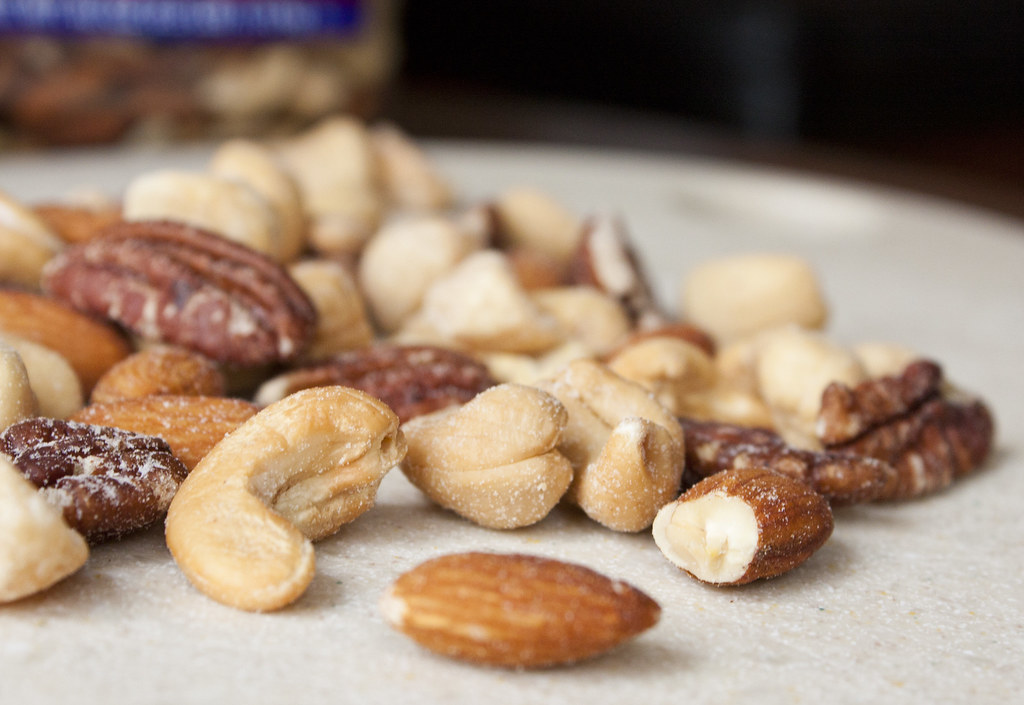
  • 6 cups nuts (such as: almonds, pecans, hazelnuts, walnuts, cashews, or peanuts)


Directions:
  1. Preheat oven to 350˚F.
  2. Line 2 medium sized baking pans with parchment paper.  Set aside.
  3. In a small bowl combine: sugar, chipotle powder, salt, pepper, and cayenne pepper.  Stir and combine well.
  4. In a large bowl beat egg white with an electric mixer for approximately 1 minute.  Slowly add honey while continuing to blend with the mixer; combine well.
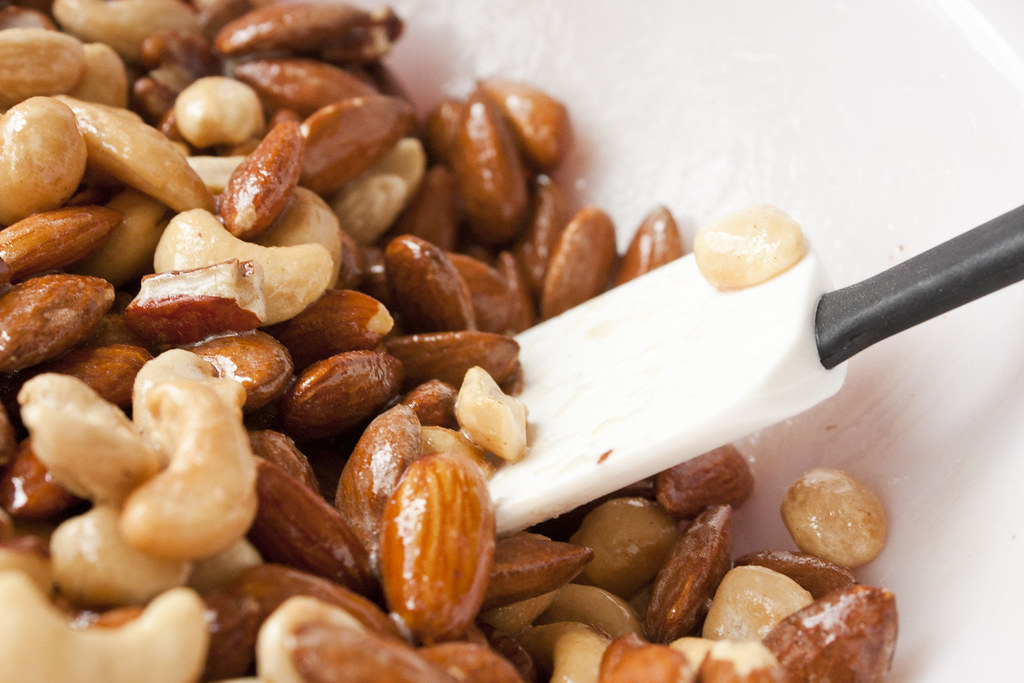
  5. Add all of the nuts into the egg white - honey mixture.  Using a spatula, mix by hand, until all of the nuts are evenly coated with the mixture. 
  6. Pour sugar and spice mixture over the nuts.  Mix until well combined. 
  7. Divide nuts between the 2 pans, spreading into a single layer.  Bake for 20 minutes, stirring every 7 minutes.
  8. Remove from pan & allow to cool.  Once cooled, nuts will be stuck together.  Break apart by hand into individual pieces.

Monday, December 12

French Onion Soup

If you work for a large corporation like I do (MRM), it’s that time of year when you need to use your PTO days before you lose them.  I have a few left so I extended my weekend into a nice, extra long weekend.  My God I felt like I accomplished the world today!  Having one additional day off feels wonderful.  I was unstoppable today. 

Beyond running a lot of errands, I decided to make French Onion Soup.  I had just the perfect recipe as there was one sitting in my ‘recipes to try’ pile.  I love French Onion Soup, but it’s a dish that I’ve never made because it always seemed a little intimidating. Not anymore!  Don’t let it scare you because it’s actually quite easy.  

Get ready to chop!

If you’re like me and have never made this soup, you’re probably wondering what beef consommé is.  I have never heard of it until I scanned the list of ingredients below to put together my shopping list.  In researching this I learned that beef consommé is a highly clarified soup made from beef stock. The consommé is clarified by removing the fat, straining it, and adding egg whites (protein) to remove the cloudiness.  Where can you find this ingredient?  In the soup aisle at your local grocery store.  I searched for it near the broths and was unsuccessful until I scoped out the soups and found that Campbell’s makes beef consommé.

Slice & toast the baguette


Trust me, this soup is easy and within a matter of only 30 minutes you’ll have ‘Panera-like’ quality soup.  What’s so great is that your whole house will smell wonderful as this soup is cooking.  My husband, who was working upstairs, came all the way downstairs to ask what we were having for lunch because he said it smelled amazing!  When the soup was finished, and came out of the oven, I felt so proud of these masterpieces.  The melted cheese on top was bubbly, golden, and just begging for our spoons to dive in. This French Onion Soup received stamps of approval from both of us.  My husband jokingly exclaimed, “Oh great, here’s another dish I can’t order at a restaurant because it won’t compare to yours”.  It’s comments like these that make a chef swoon.  Enjoy!


French Onion Soup
Adapted from Recipe #11181 by Elizabeth Fullerton, food.com
Serves:  4
Prep Time: 10 mins.
Total Time:  30 mins.

Ingredients:
  •     2 (14.5 oz.) cans reduced sodium beef broth
  •     1 (10.75 oz.) can beef consommé
  •     2 large vidalia onions
  •     2 tablespoons butter
  •     2 garlic cloves, minced
  •     2-3 dashes Worcestershire sauce
  •     3/4 cup shredded swiss cheese
  •     3/4 cup shredded mozzarella cheese
  •     8 slices French baguette

Directions:

  1. Set oven to broil mode at 400˚F.
  2. Place baguette slices on a cookie sheet and broil until toasted (2-3 minutes). Remove and cool before halving each slice (there will be 16 slices total).
  3. Slice onions to preferred thickness and length.  Melt butter in a large saucepan over medium heat. 
  4. Add onions and sauté until tender (approximately 8-10 minutes); stir frequently.   Add garlic during the last 1-2 minutes of cooking so that it will not burn.
  5. Add beef broth, beef consommé, and Worcestershire sauce.
  6. Bring to a boil; stir constantly for 1 minute.
  7. Combine swiss and mozzarella cheese in a medium sized bowl.  Toss until evenly mixed.
  8. Measure 1/2 cup of cheese mixture and sprinkle into the bottom of 4 oven proof bowls.  Divide evenly amongst the bowls.  Note:  I used large soup bowls that were only labeled as dishwasher and microwave safe.  These worked and did not break, but please note there is a possibility they could break.
  9. Ladle soup into each bowl and leave room at the top of the bowl (allow at least 1-2 inches from soup to top of bowl).  Top each bowl with 4 slices of toasted baguette. 
  10. Sprinkle and divide remaining cheese mixture evenly amongst the bowls.
  11. Broil until cheese is bubbly and just starting to turn golden (approximately 4-5 minutes).
  12. Serve immediately, but be careful as the bowls will be very hot.


Sunday, December 4

ChocoCran Biscotti

My husband and I eat pizza quite frequently.  I love making it at home because I think it tastes better than delivery from local pizza chains.  We love thin crust pizza.  Don’t get me wrong, we adore deep dish as well (Chicago Deep Dish!!!!) but it’s so much easier to make thin crust during the week for dinner.  I’ve made pizza dough from scratch (typically on the weekends) but after I’m home from work I want to assemble my pizza and put it in the oven ASAP.  To save time I use Martha White’s Thin & Crispy Pizza Crust Mix.  All you have to do is add warm water, oil.  Wait a few minutes and VOILA!  You have pizza dough!  I’ve tried a few instant mixes, but Martha White’s is super simple and tastes the best. 

You’re probably wondering why I’m talking about pizza dough when this post is for ChocoCran Biscotti, right?  Well, the Martha White brand has been around for over 100 years and became popular because they helped women bring convenience into the kitchen.  It just so happens that they recently featured a cooking contest on their website.  I’ve never entered a cooking contest so I wanted to give it a shot.  The challenge was to use any of their muffin mixes and turn them into something else besides muffins. Simple right?  Not quite. There were over 15 mixes to choose from.  Where to begin?


Choosing an idea was not the hard part, deciding what mix to use was.  Trust me, I went through many trial and errors in the kitchen.  It would be impossible for us to eat everything I baked so I began sneaking my creations into work and conveniently placing them near the coffee stations.   I say ‘sneak’ because I’m sure people began to wonder who the crazy person was that kept baking blueberry bread over and over.   I finally created 2 entries that I was proud of….Blueberries N’ Cream Bread and ChocoCran Biscotti.  

Plumping the dried cranberries

Form into logs and bake

Slice diagonally after finished baking

With the holidays quickly approaching I’ve had many requests to share my ChocoCran Biscotti recipe, so here it is!  What’s great is that it’s very easy to make (thanks Martha!) and it tastes amazing when dunked into a cup of hot coffee or tea!  And a special thanks to Sam Cusenza who was the winner of my naming contest.   I received a lot of great entries but ChocoCran Biscotti was by far the most popular!  Congratulations Sam!  You'll receive your very own personal batch of ChocoCran Biscotti this week.


ChocoCran Biscotti
Original recipe by Alissa Hebert
Servings: 22-24 slices
Prep Time:  10 mins.
Total Time: 2 hours 45 minutes (cooling time included)


Ingredients:

  • 2 (7.4 oz.) packages Martha White Chocolate Chip Muffin Mix
  • 2/3 cup All-Purpose Flour
  • 1/2 cup (1 stick) butter
  • 2 large eggs, slightly beaten
  • 1 cup dried cranberries

Topping:
  • 1/2 cup white chocolate chips

Directions:
  1. Preheat oven to 350˚F. Cover a large baking sheet (16 x 14 inches) with parchment paper. 
  2. Plump dried cranberries by placing in a small bowl and covering with hot water.  Soak for 5 minutes; drain.
  3. Soften butter by placing in a small bowl and heating in the microwave for 35 seconds.  In a large bowl use an electric mixer to combine softened butter, eggs, flour, muffin mix, and cranberries.  
  4.  Lightly flour countertop and dust hands with flour.  Place half of dough on counter and form a 10 x 3 inch log.  Place log on parchment lined baking sheet and slightly flatten. Repeat with remaining dough; space logs 2 to 3 inches apart.
  5. Bake for 25 minutes or until a toothpick inserted in the center comes out clean.  Cool on baking sheet for 1 hour.   After cooled, transfer biscotti to a cutting board and use a serrated knife to cut each log diagonally into 1/2 inch wide slices.
  6. Return slices to baking sheet and lay flat on parchment paper.  Bake for 10 minutes.  Remove from oven, turn slices over, and bake for 10 minutes.  Allow biscotti to fully cool on baking sheet for 1 hour. 
  7. Prepare topping by adding white chocolate chips to a small microwave safe bowl.  Heat in microwave, on medium-high, for 1 minute.  Stir until smooth.  If necessary, microwave for 20 second intervals until chocolate is melted.  Use a fork or spoon to drizzle topping over the biscotti.
  8. This biscotti is best enjoyed when served with a cup of coffee or tea for dunking.  Enjoy!


Related Posts Plugin for WordPress, Blogger...